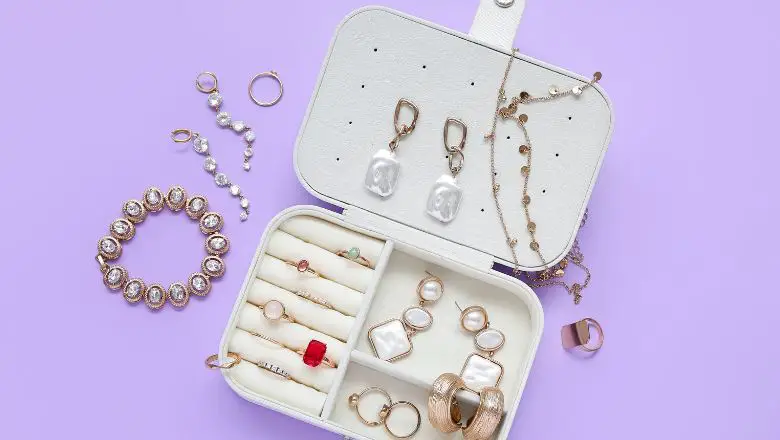
Ready to dive into a world of glimmering treasures and creative storage solutions? Well, let me tell you, I used to be just like you – grappling with tangled necklaces, mismatched earrings, and the constant struggle to find my favorite pieces.
But fear not! I’ve stumbled upon some seriously amazing DIY jewelry storage ideas that have turned my tangled mess into an organized oasis. Trust me, it’s a game-changer!
From transforming everyday items into stylish display cases to crafting nifty organizers that’ll have you wondering why you didn’t think of it sooner, I’m about to spill the beads on the most ingenious solutions I’ve discovered.
Say goodbye to the days of frantically searching for that one elusive earring – with these fabulous ideas, you’ll be accessorizing like a pro in no time!
So, are you as excited as I am? Get ready to unleash your inner creativity and unlock the secrets to a perfectly organized jewelry collection.
Without further ado, let’s jump right into these five dazzling DIY jewelry storage ideas that are about to make your life sparkle and shine!
Organize Your Gems in Style: 5 Jaw-Dropping DIY Jewelry Storage Hacks!
If you’re tired of untangling necklaces and digging through drawers to find a matching pair of earrings, it’s time to get your jewelry collection organized. But who says organizing has to be boring?
With these 5 genius DIY jewelry storage hacks, you can keep your gems in order and display them with style!
DIY Jewelry Storage Idea #1: Repurposed Vintage Drawer Jewelry Organizer
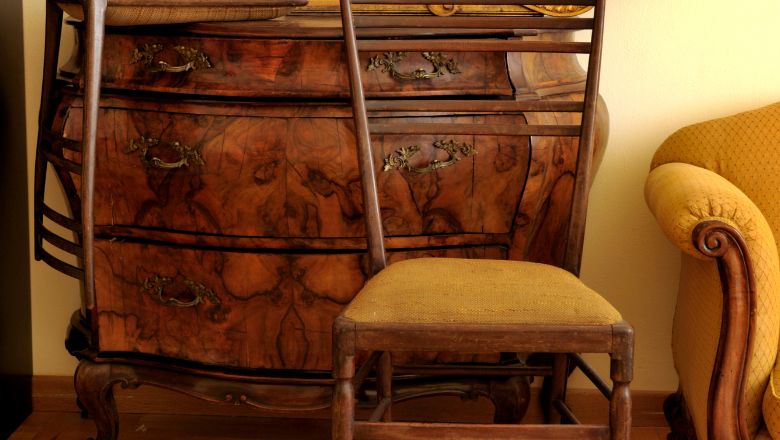
Vintage drawers, those charming relics from the past, can work wonders for organizing your precious gems with a touch of nostalgia.
So, here’s how I transformed an old vintage drawer into a quirky jewelry organizer that’s now the envy of all my friends!
Vintage Drawer DIY Jewelry Organizer
Picture this – a weathered vintage drawer, complete with intricate handles and a story to tell.
It’s the perfect canvas for turning your messy jewelry collection into a stunning work of art! By repurposing this vintage gem, you’ll add a touch of character to your room and have a blast organizing your treasured baubles.
Materials Needed
To embark on this creative journey, you’ll need a vintage drawer (any size that fits your space), sandpaper, paint or wood stain, a foam brush, and decorative knobs to add a personal touch.
Step-by-Step Guide
1. Clean and prepare the vintage drawer: Start by wiping away any dust and grime from the drawer’s surface with a damp cloth. Embrace the vintage charm, or if you prefer, gently sand the wood to create a smoother canvas.
2. Add a splash of color: Time to get artsy! Pick a paint color that complements your room’s decor or opt for a classic wood stain to enhance the drawer’s natural beauty. Use a foam brush to apply the paint or stain evenly and let it dry thoroughly.
3. Choose decorative knobs: Head to your favorite craft store and find some charming knobs that speak to your style. Whether it’s sleek and modern or quirky and vintage, these knobs will add a delightful twist to your jewelry organizer.
4. Install the knobs: Once your drawer is dry, it’s time to attach the decorative knobs. Simply mark the spots where you want them to go, and using a screwdriver or drill, secure the knobs in place.
Personalization
Now comes the most exciting part – personalizing your vintage drawer jewelry organizer! Arrange your jewelry pieces inside the different compartments, experimenting with various layouts until you find the perfect display.
Don’t forget to mix and match different jewelry styles for a unique and eclectic look!
Ready to embrace the charm of the past while keeping your jewelry organized? Give this repurposed vintage drawer jewelry organizer a go, and trust me, you’ll fall head over heels for your new treasure chest of accessories!
DIY Jewelry Storage Idea #2: Boho Hanging Macramé Jewelry Display
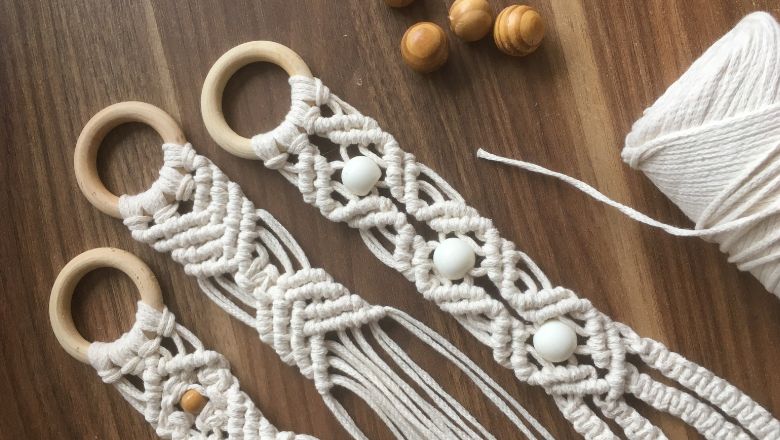
Prepare to be mesmerized by the boho magic of this next DIY jewelry storage idea – the Boho Hanging Macramé Jewelry Display!
I couldn’t resist trying this one out after falling in love with the bohemian aesthetic, and it’s become a stunning focal point in my room!
DIY Wall Jewelry Organizer
Boho style is all about nature-inspired elements and a carefree spirit, and what better way to embrace it than through a boho-inspired macramé jewelry display?
This hanging masterpiece not only keeps my jewelry organized but also adds a touch of wanderlust to my space.
Materials Needed
To weave your boho dreams into reality, gather some macramé cord (choose your favorite color!), a dowel rod or a sturdy branch, scissors, and a hook or nail to hang your creation.
1. Knotting the cord: Start by cutting several pieces of macramé cord, each about 4 feet long. Fold each cord in half and attach them to the dowel rod using a simple loop knot. These will be the base for your hanging jewelry organizer.
2. Weaving the pattern: Time to weave some boho magic! Use a mix of square knots, spiral knots, and half hitch knots to create a beautiful macramé pattern. Don’t worry if you’re new to macramé – it’s easy to learn and incredibly satisfying!
3. Adding hanging strands: Once you’ve reached your desired length, create additional hanging strands by attaching more cords to the dowel rod. These strands will showcase your jewelry collection.
4. Tying off the ends: Secure all the knots tightly and trim any excess cord. This is where your jewelry will find its new home!
Display Tips
Hang your boho macramé jewelry display near a window, so it catches the natural light and casts enchanting shadows.
You can also add some dried flowers or feathers to the hanging strands for an extra bohemian touch.
Versatility
The best part about this boho jewelry display is its versatility! You can make it as large or as compact as you want, depending on your jewelry collection and available space.
Plus, it’s a fantastic excuse to get creative and experiment with different macramé knotting techniques!
Now, you have a whimsical, boho-chic jewelry display that not only keeps your treasures organized but also infuses your space with a bohemian vibe.
So, go on, unleash your inner free spirit, and weave your very own Boho Hanging Macramé Jewelry Display!
DIY Jewelry Storage Idea #3: : Pegboard Jewelry Wall Organizer
Ready to level up your jewelry storage game? Let me introduce you to the fabulous and functional Pegboard Jewelry Wall Organizer!
This DIY project transformed my cluttered accessories into an artful display, and I couldn’t be happier with the result!
Practical DIY Jewelry Storage Idea
Think of a pegboard as your blank canvas for jewelry organization – it’s versatile, customizable, and oh-so-satisfying to work with!
This practical wall organizer allows you to arrange your jewelry just the way you like it, giving you easy access to your favorite pieces every day.
Materials Needed
To get started, gather a pegboard (choose a size that suits your needs), a variety of hooks (different lengths and styles), a drill, and screws or wall anchors.
Step-by-Step Guide
1. Mounting the pegboard: Begin by finding the perfect spot on your wall to hang the pegboard. Make sure it’s at a convenient height and secured to the wall using screws or wall anchors. Remember to use a level to ensure it’s perfectly straight!
2. Organizing with hooks: Next comes the fun part – arranging the hooks! Start by attaching longer hooks at the top for necklaces and bracelets. Use shorter hooks for rings and earrings, and maybe even add a small shelf for your favorite trinkets.
3. Sorting by style: Group your jewelry by style or color to create an eye-catching arrangement. This will not only keep things organized but also add a touch of visual appeal to your display.
4. Adding extras: To add some extra flair, incorporate small baskets or cups on the pegboard to hold miscellaneous items like hairpins or brooches.
Versatility
The beauty of the pegboard jewelry wall organizer lies in its versatility! You can rearrange the hooks and accessories whenever you like, adapting your display to fit new pieces or changing trends.
Benefits
This pegboard jewelry organizer doesn’t just save you precious time getting ready in the morning; it also prevents your jewelry from getting tangled and damaged, ensuring your treasures stay in top-notch condition.
Whether you’re a minimalist or a maximalist, this pegboard jewelry wall organizer has got your back!
Plus, it’s an enjoyable project that lets you unleash your inner organizer and decorator all in one go. So, grab that pegboard and let your creativity take center stage.
DIY Jewelry Storage Idea #4: : Vintage Suitcase Jewelry Box

Oh, the Vintage Suitcase Jewelry Box – this DIY project takes me back in time while adding a touch of vintage elegance to my room!
I came across this idea while rummaging through a flea market, and it’s become a treasured keepsake that holds my beloved jewelry collection with utmost grace.
The appeal of Vintage Suitcases
There’s something truly magical about vintage suitcases – the faded colors, the retro charm, and the stories they carry.
By repurposing one into a jewelry box, you’ll not only give it a new life but also create a statement piece that stands out in any room.
Materials Needed
For this project, you’ll need a vintage suitcase (the size is up to you), foam inserts or velvet fabric, a utility knife, and some adhesive.
Crafting Instructions
1. Preparing the suitcase: Start by cleaning the vintage suitcase inside and out, ensuring it’s free from any dirt or debris. Embrace the vintage character, or if you prefer, gently polish the exterior to restore its original shine.
2. Creating compartments: To keep your jewelry organized and secure, use foam inserts or velvet fabric to create compartments within the suitcase. Measure the size of your jewelry pieces and cut the foam or fabric accordingly, then arrange them inside the suitcase.
3. Adding a mirror: For an extra touch of luxury, consider adding a small mirror to the inside of the suitcase’s lid. Not only is it practical for trying on jewelry, but it also adds a touch of vintage glamour.
4. Closing the deal: Once you’re satisfied with the organization, secure the foam or fabric in place with adhesive to ensure your jewelry stays in place.
Travel-Friendly
One of the best parts of this vintage suitcase jewelry box is its travel-friendly nature!
You can easily close it up and take your jewelry with you on your adventures. It’s like carrying a piece of your room’s charm wherever you go.
Personalization
The beauty of using a vintage suitcase is that it’s already unique, but you can add your personal touch to it as well! Consider attaching vintage luggage tags, decorative stickers, or a tassel to the suitcase’s handle.
Now you have a timeless jewelry box that not only protects your treasures but also becomes a conversation starter in your home.
It’s a DIY project that’s brimming with nostalgia and style, just like you and your jewelry collection!
DIY Jewelry Storage Idea #5: : Picture Frame Earring Organizer
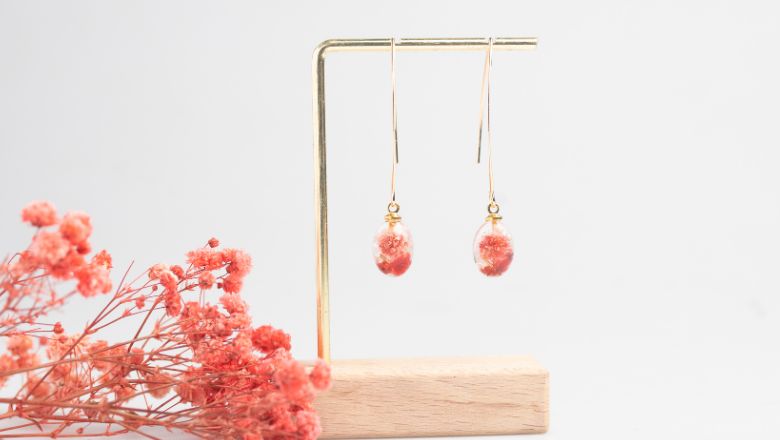
Oh, let me share with you the ingenious Picture Frame Earring Organizer!
This DIY project transformed my earring collection into a stunning display, making it easier than ever to find the perfect pair for any occasion.
Creative Storage Idea For Jewelry
Picture frames aren’t just for displaying photographs – they can double as a fabulous organizer for your earrings too!
This creative idea caught my eye while redecorating my room, and I’ve never looked back since.
Materials Needed
Gather a picture frame of your choice (the larger, the better), wire mesh or chicken wire, wire cutters, a staple gun or glue, and decorative elements like ribbons or paint (optional).
Crafting Steps
1. Prepare the frame: Start by removing the glass and backing from the picture frame, leaving just the frame itself. You can paint the frame in your favorite color or leave it in its original form for a more rustic feel.
2. Adding the wire mesh: Measure the dimensions of the frame and cut the wire mesh or chicken wire to fit snugly inside. Use a staple gun or glue to secure the wire mesh to the back of the frame, making sure it’s taut and sturdy.
3. Hanging your earrings: Now comes the fun part – hanging your earrings! Use the wire mesh as a canvas to showcase your beautiful earrings. Simply hook them onto the mesh, and they’ll stay in place.
4. Personal touches (optional): To add a touch of flair, consider decorating the frame with ribbons, paint, or other decorative elements that match your room’s decor.
Display Inspiration
Hang the picture frame earring organizer on a blank wall or in your dressing area, where you can easily see and access your earring collection.
It not only keeps your earrings organized but also doubles as a stunning wall art piece.
Benefits
This picture frame earring organizer is not only practical but also a fantastic space-saving solution.
Say goodbye to digging through a cluttered jewelry box – with a glance, you’ll know exactly where to find your favorite earrings!
Versatility
The beauty of this earring organizer is its versatility! You can choose the size of the frame and customize it to fit your earring collection perfectly.
Plus, you can easily rearrange your earrings to create different patterns or styles.
There you have it – a charming and functional Picture Frame Earring Organizer that’s sure to impress anyone who sees it!
Now, go ahead and showcase your earring collection like the true art it is!
Embrace the Glamour: Transform Your Jewelry Storage Today!
Can you believe how simple it is to turn chaos into a symphony of organized elegance? Let me tell you, trying out these 5 DIY jewelry storage ideas has been an absolute blast!
Gone are the days of struggling to find my favorite pieces buried under a mountain of accessories. With a touch of creativity and a pinch of DIY magic, my once-messy jewelry collection is now a dazzling showcase of order and style.
Picture this: no more untangling necklaces before a night out, no more frantically searching for matching earrings, and no more missing bangles – it’s all smooth sailing now! I’ve even caught myself admiring the beautifully crafted organizers almost as much as my beloved jewelry.
So, if you’re ready to add a sprinkle of charm and a whole lot of convenience to your everyday accessorizing, don’t hesitate to embark on this fun-filled journey of DIY jewelry storage ideas!
