Summer is here, and what better way to keep your kids entertained than with some fun and easy DIY crafts?
In this article, I will share with you 5 creative and colorful crafts that will not only keep your kids busy but will also add a touch of sunshine to your home.
Get ready to discover some exciting and affordable ways to brighten up your summer with your little ones!
5 DIY Summer Crafts for Kids That Will Brighten Up Your Home
Are you looking for some fun and easy DIY summer crafts to do with your kids?
Well, I’ve got you covered!
As a parent, I know how challenging it can be to find activities that keep your kids entertained, but don’t worry, I’ve got 5 amazing crafts that your little ones will love.
Not only are they easy to make, but they will also add a pop of color and brightness to your home.
So, grab your materials, and let’s get crafting!
Summer Crafts for Kids #1: Seashell Wind Chimes
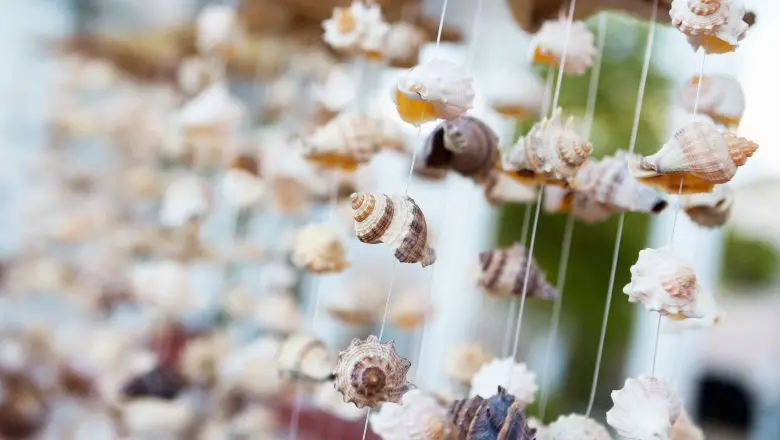
As a beach lover and a mom, I have made countless seashell wind chimes with my daughter, and it’s always a fun and rewarding experience.
Here is a step-by-step guide on how to make your own Seashell Wind Chimes at home:
Materials Needed:
- Seashells (collected from the beach or purchased here)
- A stick or a piece of driftwood
- Fishing line or string
- Scissors
- Drill (optional)
Step 1: Collect your seashells
The first step in making your Seashell Wind Chimes is to collect seashells. Take a stroll on the beach or buy some seashells from a craft store. Choose shells of different sizes and shapes, as this will add depth and texture to your wind chime.
Step 2: Prepare your stick or driftwood
Next, find a sturdy stick or a piece of driftwood. You can leave it natural or paint it with colors of your choice. You can even add some decorative elements to it like ribbons or beads.
Step 3: Drill holes (optional)
If your seashells don’t have natural holes in them, you’ll need to drill holes through the center of each shell. Make sure you use a small drill bit and be careful not to crack the shells. If you don’t have a drill, you can use a hammer and a nail to make a small hole in the shell.
Step 4: Thread your seashells
Once you’ve prepared your seashells and your stick, it’s time to start threading. Cut a length of fishing line or string and thread it through each shell, tying a knot at each end of the string. Be sure to tie the knots tightly to keep the shells in place.
Step 5: Tie the strings to the stick
Once you have threaded all of your seashells, it’s time to tie them to your stick. You can tie them in a row or a random pattern, depending on your preference. Be sure to space them out evenly along the length of the stick.
Step 6: Add a hanger
Finally, tie a length of string or fishing line to each end of the stick to create a hanger for your Seashell Wind Chime.
Congratulations, you’ve just made your very own Seashell Wind Chime! Hang it outside on a sunny day and listen to the relaxing sound of the shells clinking in the breeze.
Some tips for making the perfect Seashell Wind Chime:
- Make sure your stick or driftwood is sturdy enough to hold the weight of your seashells.
- Be sure to tie your knots tightly to prevent your shells from falling off.
- Experiment with different colors, shapes, and sizes of shells to create a unique and interesting wind chime.
- You can also add other elements like beads, ribbons, or bells to make your wind chime even more special.
Enjoy making your Seashell Wind Chime with your kids, and have fun creating beautiful and unique beach-inspired crafts together!
Summer Crafts for Kids #2: Flower Pot Painting
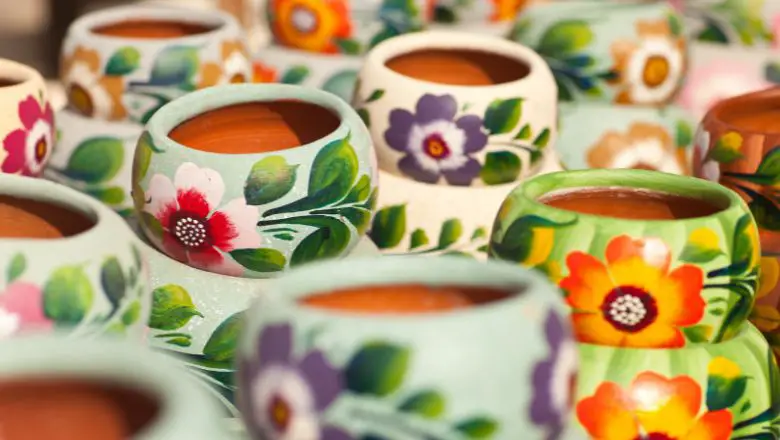
I love spending time in the garden with my daughter, and painting flower pots is one of our favorite activities.
Here’s a step-by-step guide on how to paint flower pots and make them look beautiful and unique:
Materials Needed:
- Terra cotta pots (available here)
- Acrylic paints
- Paintbrushes
- A cup of water
- Newspaper or old cloth
Step 1: Prepare your workspace
The first step in painting flower pots is to prepare your workspace. Cover your work area with newspaper or an old cloth to protect it from spills and stains. Make sure you have all your supplies within reach.
Step 2: Choose your paint colors
Next, choose your paint colors. Acrylic paints work well on terra cotta pots and come in a variety of shades. You can choose one color or create a color scheme by combining different colors.
Step 3: Paint your flower pots
Start painting your flower pots by applying a base coat of paint. You can use a paintbrush or sponge to apply the paint. Once the base coat is dry, you can add more colors or designs to create a unique look. You can create patterns, stripes, polka dots, or even write words on your pots.
Step 4: Let your pots dry
Once you have finished painting your flower pots, let them dry completely. This may take a few hours or even overnight, depending on the thickness of the paint.
Step 5: Seal your pots (optional)
If you want your flower pots to last longer, you can seal them with a clear varnish or sealer. This will protect the paint from fading or chipping and make them weather-resistant.
Congratulations, you’ve just made your very own painted flower pots! Place them in your garden or use them to display indoor plants and add a pop of color and creativity to your space.
Some tips for making the perfect painted flower pots:
- Start with a base coat and add layers of color or designs to create depth and texture.
- Use stencils or painter’s tape to create neat lines and shapes.
- Experiment with different patterns, color schemes, and designs to create a unique and interesting look.
- Don’t forget to have fun and let your creativity flow!
Enjoy painting your flower pots and adding some color and personality to your home decor!
Summer Crafts for Kids #3: DIY Paper Fans

I remember making paper fans with my mom when I was a kid, and it was one of my favorite craft activities. Here’s a step-by-step guide on how to make your paper fans:
Materials Needed:
- Colored paper or cardstock
- Ruler
- Scissors
- Glue
- Wooden sticks or skewers
- Decorations (optional)
Step 1: Cut your paper
Cut your colored paper or cardstock into a rectangular shape, with a width that’s slightly smaller than the length of your wooden stick. The length of the paper can vary depending on how large you want your fan to be, but a length of around 8-10 inches works well.
Step 2: Fold your paper
Using a ruler, fold your paper in an accordion style, making sure the folds are even and crisp. You can adjust the width of each fold to your preference, but a width of around 1 inch works well.
Step 3: Secure your paper
Once you have folded your paper, glue the two ends together to secure it in place.
Step 4: Add your wooden stick
Take your wooden stick or skewer and glue it to one end of your folded paper. Make sure to leave enough space for a handle on the other end of the paper.
Step 5: Decorate your fan (optional)
If you want to add some decorations to your fan, now is the time to do so. You can use stickers, markers, or glitter to personalize your fan and make it look unique.
Congratulations, you’ve just made your very own DIY paper fan! Make as many as you want in different colors and sizes and use them to cool off during the hot summer months. You can even use them as decorations for your next summer party or barbecue.
Some tips for making the perfect DIY paper fans:
- Use a bone folder or credit card to make sharp creases for a neat and clean look.
- Experiment with different paper colors and patterns to create unique and interesting designs.
- Use glue sparingly to avoid making the paper soggy or wrinkled.
- Don’t forget to have fun and let your creativity flow!
DIY paper fans are a fun and easy summer craft activity that kids will love. It’s a great way to spend quality time with your children and keep them entertained during the summer heat. Enjoy making your paper fans and staying cool all summer long!
Summer Crafts for Kids #4: Homemade Bubble Wands

I remember when I made my first bubble wand with my little cousin, and it was so much fun. Here’s a simple guide on how to make your bubble wands:
Materials Needed:
- Pipe cleaners or wire
- Beads (optional)
- Scissors
- Bubble solution
- Container (to hold bubble solution)
Step 1: Cut your pipe cleaners
Take your pipe cleaners or wire and cut it to your desired length. A length of around 12-18 inches works well for a single wand.
Step 2: Shape your wand
Fold the pipe cleaner in half to create a loop shape. You can also twist the two ends of the pipe cleaner together to create a handle. You can get creative with the shape of your wand and create any design you like.
Step 3: Add beads (optional)
If you want to add some extra decoration to your wand, string some beads onto the pipe cleaner before shaping it into a loop. This can add some color and sparkle to your bubble wand.
Step 4: Dip and blow bubbles
Pour some bubble solution into a container and dip your homemade bubble wand into the solution. Make sure the loop is completely submerged in the solution. Then, gently blow through the handle of the wand to create bubbles.
Congratulations, you’ve just made your very own homemade bubble wand! You can make multiple wands in different shapes and sizes to experiment with different bubble designs. And don’t forget to take some photos of your bubble creations.
Here are some tips for making the perfect bubbles with your homemade wands:
- Use a high-quality bubble solution for the best results.
- Try blowing bubbles on a windy day to see how far they can travel.
- Experiment with different shapes and sizes of wands to create unique bubble patterns.
- Have fun and enjoy the process!
Homemade bubble wands are a fun and easy summer craft activity that kids of all ages will love. It’s a great way to spend time outdoors and create some magical moments. So go ahead and get creative with your bubble wands, and see where your imagination takes you!
Summer Crafts for Kids #5: Summer Memory Jar
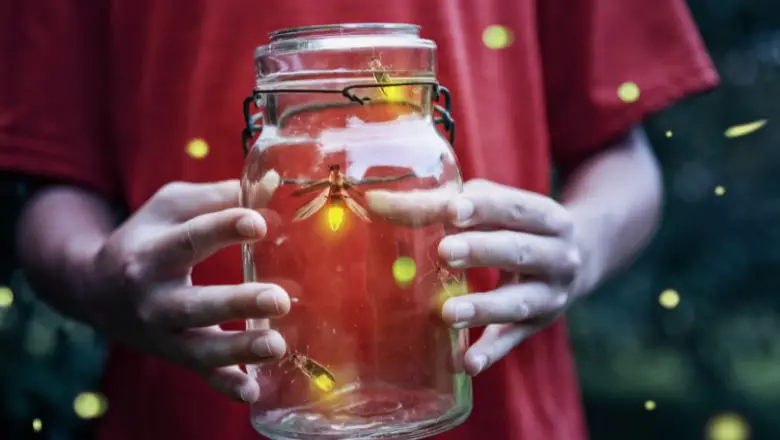
A summer memory jar is a fun and creative way to keep track of all the fun things you did over the summer.
Here’s how you can make your summer memory jar:
Materials Needed:
- Mason jar or any clear jar with a lid
- Colored paper or cardstock
- Scissors
- Pen or marker
- Glue or double-sided tape
- Photos, ticket stubs, seashells, or any small objects that remind you of your summer adventures
Step 1: Decorate your jar
Take your colored paper or cardstock and cut it into small pieces that can fit inside your jar. Write the name of the place or event on the paper, along with the date and any memories or thoughts you have about it. Decorate the paper with stickers or drawings to make it more colorful.
Step 2: Fill your jar
Put your decorated paper into the jar, along with any small objects that remind you of your summer adventures. This could include seashells, ticket stubs, photos, or anything else that brings back fond memories.
Step 3: Keep adding to your jar
Throughout the summer, keep adding to your memory jar as you have new experiences. You can also encourage your kids to write down their memories and add them to the jar.
Step 4: Enjoy your memories
At the end of the summer, open up your memory jar and enjoy all the memories you’ve collected. You can read through the notes and reminisce about all the fun times you had.
A summer memory jar is a great way to keep track of all the fun things you did over the summer. It’s a fun and easy DIY project that anyone can do, and it’s a great way to spend time with your kids.
Ready To Keep Your Kids Entertained All Summer Long?
Summer is the perfect time to get creative with your kids and make some fun and colorful crafts that will brighten up your home.
With these 5 DIY summer crafts, you can create memories with your little ones while adding a personal touch to your home decor.
From seashell wind chimes to memory jars, these crafts are sure to keep your kids entertained and engaged all summer long.
So, why not give them a try and see the smiles on your kids’ faces as they proudly display their creations in your home?
