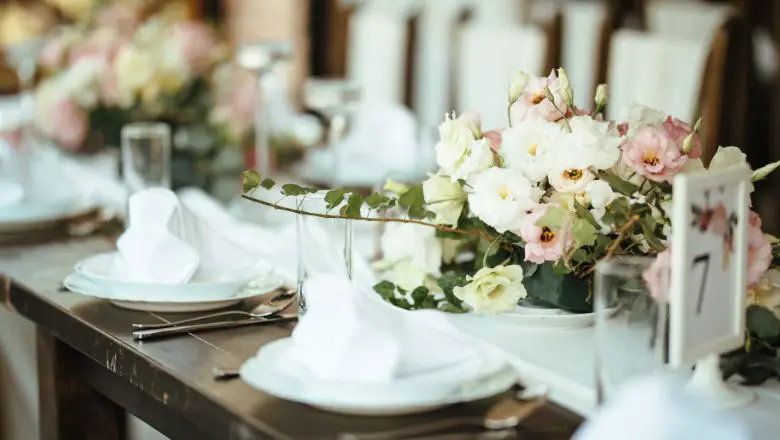
So, you’re planning your dream wedding, and you want it to be magical, right?
Well, let me tell you something – you don’t need a fortune to make your big day extra special. Today, I’ve got a little treat for you!
I’m going to spill the beans on 5 incredible DIY wedding centerpieces that won’t break the bank.
You know, when I was getting ready for my wedding, I had this idea that gorgeous centerpieces would cost an arm and a leg. But guess what?
With a little creativity and a dash of imagination, you can have jaw-dropping centerpieces that will have your guests talking for years to come.
Stick around, and I’ll walk you through the step-by-step process of creating these beauties. You’ll find everything you need – from materials and tools to simple tricks that make a huge difference.
And hey, even if you’re not tying the knot yourself, these ideas could be a fantastic gift for a friend or family member.
Let’s make your wedding day extra special together – shall we? Ready, set, let’s get crafting!
Craft Your Dream Wedding: 5 DIY Centerpieces on a Budget!
Planning a wedding can be an exhilarating experience, but let’s face it, it can also be a financial rollercoaster.
One area where costs can quickly spiral out of control is the centerpiece arrangements.
However, don’t fret! With a little creativity and some DIY magic, you can have stunning centerpieces that will not only wow your guests but also keep your budget intact.
Below, we will explore five unique and affordable ideas for DIY wedding centerpieces that are sure to make your special day even more memorable.
So get ready to unleash your inner artist and create beautiful focal points that will have everyone talking long after the last dance has ended.
DIY Centerpiece Idea #1: Rustic Elegance – Mason Jar Fairy Lights
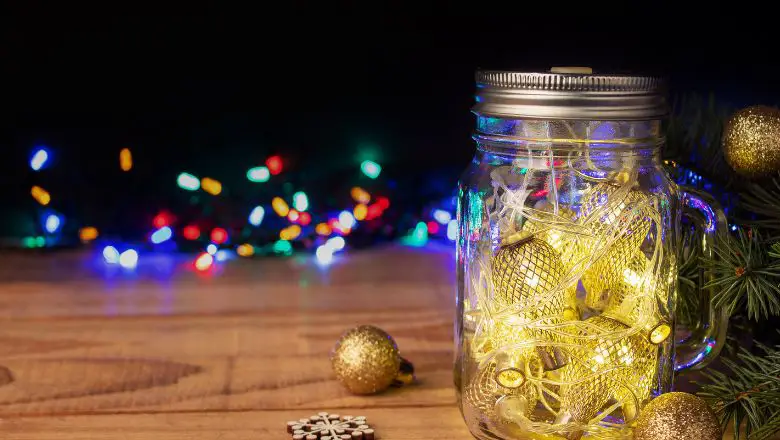
Picture this: a soft, dreamy glow enveloping your wedding tables, creating an enchanting atmosphere that sets the perfect tone for your special day.
Well, my DIY wedding virtuoso, with our first centerpiece idea, you can achieve just that!
Get ready to bask in the warm embrace of Mason Jar Fairy Lights.
Materials Needed
- Mason jars (various sizes for added charm)
- Fairy lights (battery-operated for convenience)
- Burlap ribbon (to add a touch of rustic flair)
- Twine (for that perfect finishing touch)
Step-by-Step Guide
- Start by wrapping the fairy lights around your fingers to form a bundle that fits nicely inside the Mason jar.
- Gently place the light bundle inside the jar, ensuring the battery pack hangs over the jar’s rim for easy access.
- Next, tie a beautiful burlap ribbon around the neck of the jar, securing it with a charming twine bow.
- Repeat the process with as many Mason jars as you desire to create a whimsical display.
Customization Tips
- Consider painting the Mason jars in your wedding colors or distressing them for that vintage appeal.
- Intertwine fresh flowers or greenery around the fairy lights to add a touch of natural beauty.
- Personalize the jars by attaching small photo tags to each one, featuring pictures of you and your partner through the years.
The Cozy and Romantic Ambiance
As the sun dips below the horizon and the stars start to twinkle, your Mason Jar Fairy Lights will come to life, illuminating your reception with a captivating glow.
The rustic elegance they exude will create an intimate and romantic ambiance, making your guests feel like they’re in a fairytale wonderland.
These centerpieces will not only look stunning in photos but will also become cherished keepsakes, reminding you of the love-filled day you said, “I do.”
Your Rustic Elegance centerpieces will leave your guests in awe and make your wedding truly unforgettable.
DIY Centerpiece Idea #2: Enchanting Blooms – DIY Flower Hoop
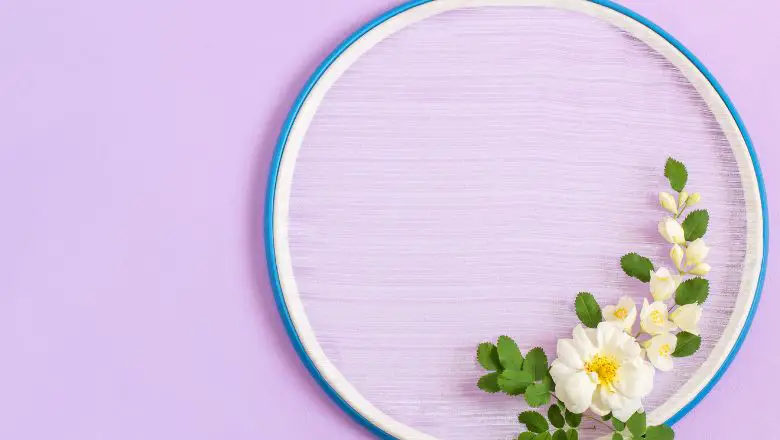
Are you ready to take your wedding centerpieces to the next level of enchantment?
Get ready to be swept away by the allure of our second centerpiece idea – the DIY Flower Hoop.
Embrace the beauty of blooms and create a whimsical masterpiece that will leave your guests spellbound.
Materials Needed
- Wooden embroidery hoop (choose your preferred size)
- Artificial flowers (opt for colors that complement your wedding theme)
- Floral wire (for securing the flowers)
- Ribbon (to add a touch of elegance)
Step-by-Step Guide
- Begin by arranging your selected artificial flowers along the wooden embroidery hoop. Feel free to mix and match different flower types and colors to create a stunning arrangement.
- Use floral wire to secure the flowers in place. Make sure they are tightly fastened to ensure they won’t budge during the celebrations.
- Once you’re satisfied with the floral arrangement, add a ribbon to the top of the hoop for that extra touch of elegance.
Versatility at Its Best
One of the most enchanting aspects of the DIY Flower Hoop is its versatility.
You can use these gorgeous creations as centerpieces, or you can hang them throughout your venue for a magical and ethereal vibe.
Imagine your guests walking beneath these beautiful floral hoops, feeling like they’ve stepped into a fairytale garden.
Personalization Ideas
- Incorporate ribbons in your wedding colors to tie the hoop to your overall theme.
- Hang delicate crystal beads or fairy lights to add a touch of sparkle.
- If you’re an outdoor wedding enthusiast, consider using fresh flowers for a truly natural look.
A Whimsical Wonderland
The DIY Flower Hoop is more than just a centerpiece; it’s a whimsical wonderland that showcases your unique love story.
Your guests will be captivated by the creativity and elegance exuded by these floral creations.
Get ready for a sea of compliments as they admire your enchanting blooms and wonder how you conjured such magic.
With the DIY Flower Hoop, you’ll sprinkle your wedding with a touch of floral enchantment that will linger in your hearts and memories for years to come.
DIY Centerpiece Idea #3: Vintage Chic – Upcycled Book Stack

Ah, the allure of vintage charm! If you’re a fan of nostalgia and classic elegance, our third centerpiece idea is tailor-made for you – the Vintage Chic Upcycled Book Stack.
Get ready to whisk your guests away to a bygone era with this delightful and eco-friendly centerpiece.
Materials Needed
- Old books (choose hardcover books with interesting covers for visual appeal)
- Lace (opt for delicate or vintage-inspired patterns)
- Ribbon (in a color that complements your wedding theme)
- Hot glue gun (to secure the layers)
Step-by-Step Process
- Begin by stacking the old books on top of each other to create a stable and visually appealing arrangement. The varying sizes and thicknesses will add character to the stack.
- Once you’ve achieved the desired height, use a hot glue gun to attach lace around the edges of each book cover. This will lend a touch of softness and elegance to the vintage display.
- Finally, tie a ribbon around the center of the book stack to add a charming finishing touch.
Vintage Personalization
The beauty of the Vintage Chic Upcycled Book Stack lies in its endless possibilities for personalization. Incorporate elements that resonate with your love story and journey as a couple.
Book Selection
Choose books that hold special meaning for you and your partner. It could be a novel that brought you together, a favorite classic you both adore or even books that represent your shared interests.
Literary Love Quotes
Don’t be shy to tuck in small cards with romantic quotes from your favorite literature or passages that have touched your hearts. Let your guests feel the literary love.
A Whiff of Nostalgia
As your guests gather around the Vintage Chic Book Stack, they’ll be transported back in time to an era of elegance and literary sophistication. The combination of old books, lace, and ribbon creates an atmosphere of timeless beauty that will leave your guests swooning.
Eco-Friendly Delight
Embrace the eco-friendly aspect of this centerpiece. Upcycling old books not only adds character to your decor but also reduces waste and adds a unique touch to your wedding.
Get ready to unleash your inner vintage connoisseur and craft a centerpiece that celebrates your love story with a touch of literary flair.
DIY Centerpiece Idea #4: Beachy Vibes – Seashell Candle Holders
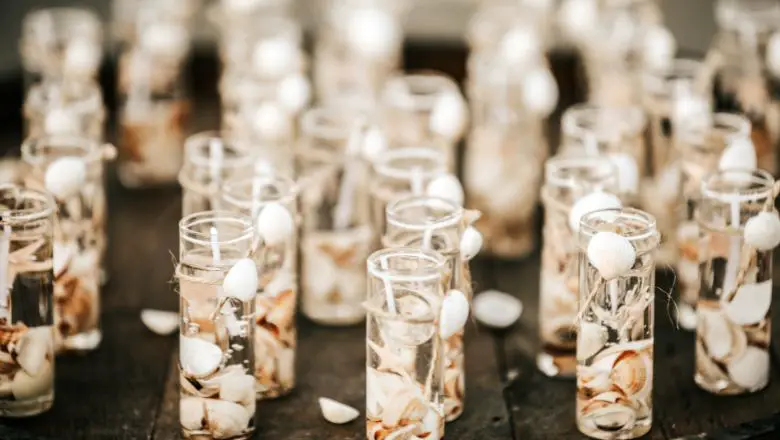
If you’re dreaming of a coastal paradise for your wedding, the fourth centerpiece idea is sure to bring those beachy vibes to your special day – the Seashell Candle Holders.
Let the shimmering candlelight dance upon seashells and create an ocean-inspired ambiance that will transport your guests to a sandy shore.
Materials Needed
- Large seashells (collected from your favorite beach or sourced from craft stores)
- Tea light candles (choose flameless for safety and convenience)
- Sand (for that authentic beach feel)
- Glue (ensure it’s suitable for adhering shells to your chosen surface)
Step-by-Step Guide
- Start by preparing the seashells by cleaning and drying them thoroughly. You can opt to keep them in their natural state or give them a light coat of clear varnish for a subtle shine.
- Once your shells are ready, apply a small amount of glue to the base of each shell and press them firmly onto a shallow dish or tray. Arrange the shells in a visually appealing manner.
- After securing the shells, pour a thin layer of sand into the dish, surrounding the seashell candle holders for that authentic beach look.
- Finally, place the tea light candles gently inside each seashell, ensuring they sit securely.
Beachy Customization
The beauty of Seashell Candle Holders lies in their ability to be customized to suit your beach wedding vision.
Tropical Touch
Add small tropical elements like palm leaves or miniature coconuts around the candle holders to amp up the beachy feel.
Ocean Treasures
If you have a special collection of unique seashells from your beach adventures, incorporate them into the centerpiece for a personal touch.
Destination Elegance
Your Seashell Candle Holders will transform your reception into a tropical oasis.
The soft glow of the candlelight reflecting off the iridescent shells will create a mesmerizing atmosphere that leaves your guests feeling like they’re dining on the shoreline.
Endless Coastal Charm
Embrace the serenity and beauty of the sea with this centerpiece idea that celebrates nature’s treasures.
Your Seashell Candle Holders will not only add a touch of whimsy but also evoke memories of sun-kissed days by the water.
So, grab those seashells, sprinkle a bit of sand, and let the beachy vibes wash over your wedding. With the Seashell Candle Holders, your celebration will be an ocean-inspired escape filled with romance and coastal charm.
DIY Centerpiece Idea #5: Whimsical Garden – Terrarium Magic
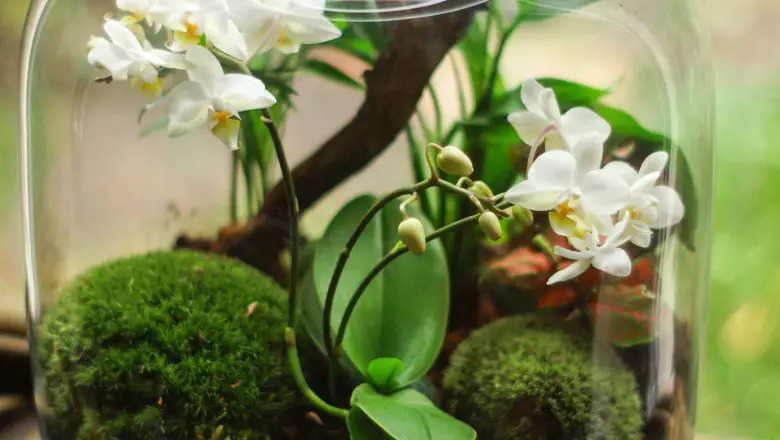
Step into a world of greenery and wonder with our fifth and final centerpiece idea – Terrarium Magic.
Let the beauty of nature take center stage as you craft a miniature garden that will add a touch of whimsy and charm to your wedding.
Materials Needed
- Glass terrarium (choose the size and shape that suits your vision)
- Miniature figurines (fairies, animals, or anything that sparks joy)
- Succulents or air plants (for easy maintenance)
- Decorative stones (to complete the magical look)
Step-by-Step Instructions
- Begin by arranging a layer of decorative stones at the bottom of the glass terrarium. This will ensure proper drainage for the succulents or air plants.
- Carefully place your chosen succulents or air plants into the terrarium, arranging them in a visually appealing manner. Mix and match different types to add variety.
- Now, sprinkle a few more decorative stones around the plants to complete the garden look.
- The final touch is adding the miniature figurines to the terrarium, placing them among the greenery as if they’ve found their own whimsical home.
Fairy Tale Magic
Your Terrarium Magic centerpiece will transport your guests into a fairy tale realm.
The combination of lush greenery, delicate figurines, and the enchanting glass enclosure will create an otherworldly ambiance that captivates all who behold it.
Low-Maintenance Wonder
Succulents and air plants are not only beautiful but also remarkably low-maintenance.
They require minimal watering and care, making them perfect for busy brides who want a stunning centerpiece without the hassle.
Personalize Your Wonderland
Infuse your Terrarium Magic with personal touches that reflect your love story.
Meaningful Figurine
Choose figurines that represent aspects of your relationship or shared interests. Whether it’s a miniature version of your pet or a symbol of a favorite travel destination, let the figurines tell your story.
Magical Lighting
Add tiny LED fairy lights inside the terrarium for a mesmerizing touch. The soft glow will elevate the whimsy and create an even more magical atmosphere.
A Garden of Dreams
The Terrarium Magic centerpiece is a dream come true for nature lovers and those who cherish the idea of a secret garden.
Your guests will marvel at the beauty of the tiny ecosystem you’ve created, and they’ll leave your wedding feeling like they’ve stepped into a magical world.
These miniature gardens will be a symbol of the everlasting growth of your love and a reminder of the wonders of the natural world.
Heartfelt and Handmade: DIY Centerpieces That Stole the Show
By diving into the world of DIY, you’ve not only saved some precious dollars but also infused your special day with a touch of your magic.
From rustic charm to modern elegance, your creativity knows no bounds!
The best part? You didn’t need a fancy degree in crafting – just a sprinkle of enthusiasm and a whole lot of heart.
Remember how you discovered that with a dash of creativity and a pinch of imagination, ordinary items turned into extraordinary centerpieces? It was like finding a treasure trove of ideas that were waiting for you all along.
As you carefully crafted each centerpiece, you poured your love into every detail. Those little touches made all the difference, creating an ambiance that felt uniquely you. And let’s not forget the joy you felt when you saw your vision come to life. Priceless!
You’ve proven that DIY doesn’t just mean “do it yourself,” but also “design it yourself” – shaping your wedding day into a canvas of memories, love, and laughter.
Your journey into the world of DIY centerpieces has not only made your day unforgettable but also empowered you with a new sense of creativity and accomplishment.
So, here’s to you, the budget-savvy DIY wedding guru! Your centerpieces have become a symbol of your love and resourcefulness, a testament to the magic that comes from putting your heart into every detail.
As you say “I do” surrounded by these crafted wonders, know that you’ve made your wedding truly extraordinary.
