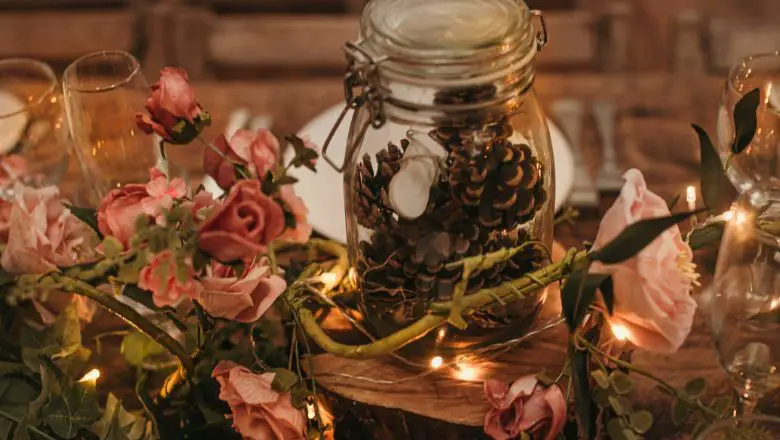
Looking to add some rustic charm to your humble abode? Well, you’re in for a treat because today, I’ve got 5 awesome DIY rustic decor ideas that’ll transform your home into a cozy haven!
Imagine walking into a space that feels warm, inviting, and brimming with character. Whether you live in a modern apartment or a traditional house, rustic decor has a magical way of infusing that touch of nature and nostalgia we all crave.
In this blog post, I’ll take you on a journey through these fantastic DIY projects that are not only super fun to create but also budget-friendly! No need to break the bank for a Pinterest-worthy home, my friend.
So grab your crafting gear, put on your creative hat, and let’s dive into these rustic DIY gems. From reclaimed wood masterpieces to vintage-inspired accents, there’s something here for every décor dreamer.
Embrace Nature’s Beauty: 5 DIY Rustic Decor Ideas to Bring the Outdoors In
Imagine walking into a cozy cabin nestled deep in the woods, surrounded by the earthy scents of pine and crackling firewood.
The warmth and comfort that fills your senses are inexplicable; it’s as if time slows down, allowing you to fully embrace the simple pleasures of life.
Now, what if you could recreate this rustic charm right in your own home? With these 5 DIY rustic decor ideas, you can infuse every corner with a touch of warmth and create a haven that transports you to that serene cabin retreat whenever you step through your front door.
Get ready to unleash your creativity and embark on a journey toward transforming your space into an inviting sanctuary.
DIY Rustic Decor Ideas #1: Driftwood Wall Art
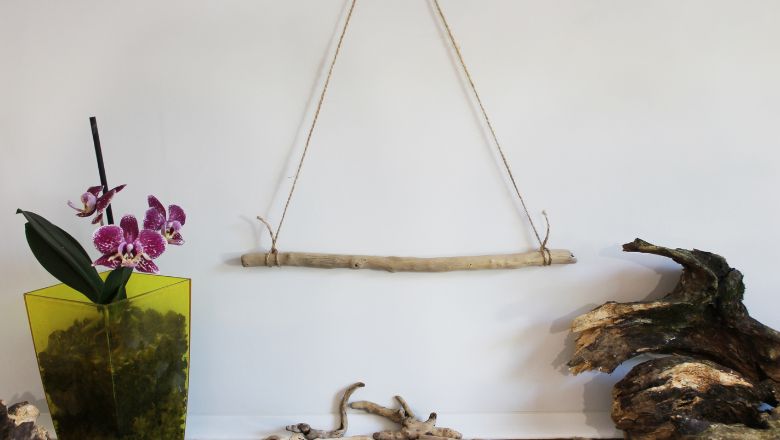
Looking to add a touch of nature’s beauty to your walls? Let’s dive into the enchanting world of driftwood wall art!
Driftwood has this magical way of capturing the essence of the sea and bringing it right into your home. So, let’s roll up our sleeves and get started on this fun and creative project!
Step 1: Driftwood Scavenger Hunt
First things first, it’s time for a little adventure! Grab your sunhat and head to the beach or riverside.
Keep your eyes peeled for those weathered pieces of driftwood scattered along the shore.
Remember, you’re not just gathering wood; you’re also collecting memories from the sea!
Step 2: Choosing Your Canvas
Now, it’s time to pick the perfect canvas for your driftwood masterpiece. You can go with a simple wooden board or a reclaimed picture frame – it’s totally up to you!
Make sure it complements the size and shape of your collected driftwood pieces.
Step 3: Assembling the Art
Get ready to bring your artistic vision to life! Lay out the driftwood pieces on your canvas, experimenting with different arrangements until you find the one that speaks to your heart.
Once you’re happy with the layout, it’s time to glue them down securely using a trusty glue gun.
Step 4: Add a Personal Touch
Here comes the fun part – adding your personal touch! You can embellish your driftwood art with seashells, small pebbles, or even a pop of color with acrylic paint.
Let your imagination run wild, and make it uniquely yours!
Step 5: Hang It Up!
Congratulations, you’ve created a stunning driftwood masterpiece! Now, it’s time to find the perfect spot to hang it up and let it grace your walls.
Whether it’s in your living room, bedroom, or hallway, your driftwood wall art will undoubtedly become a captivating focal point.
Pro Tip: Don’t forget to give your driftwood art a dusting of admiration now and then – it deserves to be cherished!
And there you have it, your very own driftwood wall art, straight from the heart of the sea to the heart of your home. Now go ahead, create, and let the ocean’s serenity infuse every corner of your living space!
DIY Rustic Decor Ideas #2: Reclaimed Wood Coffee Table

Ready to add a dash of rustic charm to your living room?
Let’s embark on a crafting journey to create a fabulous reclaimed wood coffee table that’ll have your guests swooning!
Step 1: The Thrill of the Hunt
Time to channel your inner treasure hunter! Head to salvage yards, flea markets, or even check out online platforms for reclaimed wood.
Keep an eye out for weathered, aged pieces with character. Remember, imperfections are what make reclaimed wood so special!
Step 2: Measure Twice, Cut Once
Now that you’ve got your reclaimed wood planks, it’s time to bring out the measuring tape. Determine the size and shape you want for your coffee table.
Whether it’s a sleek rectangular design or a rustic round beauty, make sure it fits your space perfectly.
Step 3: Sanding and Smoothing
Reclaimed wood might have a rugged exterior, but a little TLC can work wonders. Grab some sandpaper and gently sand the surface and edges to smooth out any rough spots.
This step will give your coffee table a polished look without sacrificing its vintage charm.
Step 4: Assembling the Puzzle
It’s puzzle time! Lay out your reclaimed wood pieces on a flat surface, envisioning the final design.
Now, it’s like putting together a puzzle – carefully arrange the planks and secure them with nails or screws. Voila! Your tabletop is taking shape.
Step 5: The Finish Line
To add a finishing touch, choose a wood stain or paint that enhances the natural beauty of the reclaimed wood.
You can opt for a dark, rich stain to highlight the wood’s grain or go for a distressed, whitewashed look for that shabby chic vibe. Whichever you choose, it’ll be a winner!
Step 6: Legs to Stand On
Time to give your coffee table legs to stand on! You can use metal hairpin legs for an industrial touch or opt for wooden legs to keep the rustic theme flowing.
Attach the legs securely to the tabletop, and make sure they’re even for a stable coffee table.
Step 7: Brew and Admire
And there you have it – your fabulous reclaimed wood coffee table is ready to impress! Now, it’s time to brew a fresh cup of your favorite coffee, sit back, and admire your masterpiece.
Be proud of the craftsmanship and creativity you poured into this DIY gem!
Pro Tip: Don’t forget to add a cute tray or a stack of books to your coffee table for that cozy, lived-in feel!
With your reclaimed wood coffee table in place, you’re now the proud owner of a conversation starter, a centerpiece, and a cozy spot to savor your coffee and create memories with loved ones.
DIY Rustic Decor Ideas #3: Mason Jar Sconces with Fairy Lights
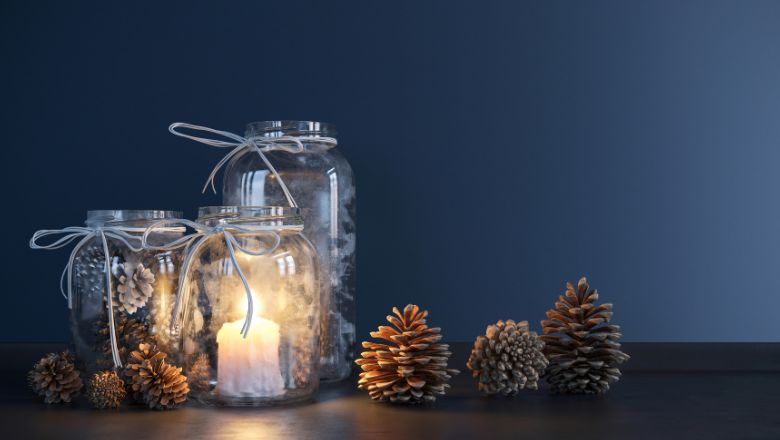
Let’s sprinkle a little magic into your home with these delightful mason jar sconces adorned with twinkling fairy lights!
Get ready to create a whimsical ambiance that’ll make your heart flutter with joy!
Step 1: Hunt for the Perfect Jars
Time to embark on a quest for the most enchanting mason jars! You can find them at thrift stores, craft stores, or even repurpose old jars from your kitchen.
Keep an eye out for charming shapes and sizes that will add a touch of whimsy to your space.
Step 2: Prep and Paint
To add a pop of color or rustic touch, you can paint the mason jar lids and bands.
Use acrylic paint in your favorite hues or opt for a distressed look with chalk paint. Let your creative spirit guide you – there are no wrong choices in this fairyland!
Step 3: Insert the Fairy Magic
Now, it’s time for the real magic! Grab some battery-powered fairy lights (the ones with tiny LEDs) and carefully insert them into the mason jars.
Coil the lights gently to create an ethereal glow, giving your sconces a dreamy ambiance.
Step 4: Secure the Sconces
To turn your mason jars into sconces, you’ll need some sturdy hangers or brackets.
Attach them to the back of the mason jars using screws or strong adhesive. Make sure they’re secure enough to hold the jars safely in place.
Step 5: Find the Perfect Spot
Time to find the perfect spot to hang your mason jar sconces!
These whimsical beauties can grace your bedroom, living room, or even your outdoor patio. Wherever you choose, they’ll cast a spell of enchantment on the whole area.
Step 6: Light Up the Night
As the sun sets and darkness embraces your space, turn on the fairy lights, and watch the magic unfold.
The soft, twinkling glow will create an atmosphere that’s straight out of a fairy tale, making your home a wonderland of dreams.
Step 7: Change with the Seasons
One of the best things about these mason jar sconces is their versatility!
You can change the fairy lights according to the seasons – warm and cozy for winter, bright and colorful for spring, and soft and magical for summer nights.
Pro Tip: You can also add some faux flowers, dried leaves, or fairy figurines inside the mason jars to make your sconces even more enchanting!
Your very own mason jar sconces with fairy lights, ready to transform your home into a fairy tale realm. Now go forth, and let the magic illuminate your life with wonder and joy!
DIY Rustic Decor Ideas #4: Rustic Rope Shelves
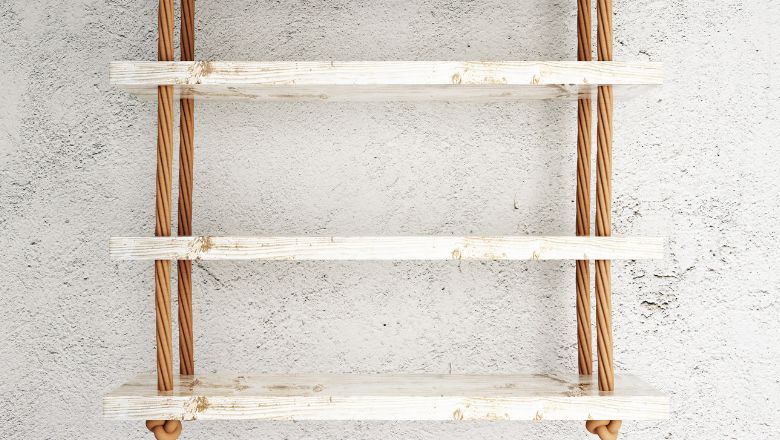
Are you ready to set sail on a crafting journey and create some nautical-inspired rustic rope shelves?
Let’s navigate through this fun and creative project to bring a touch of coastal charm to your home!
Step 1: Source Your Ship’s Supplies
Gather your materials, matey! You’ll need sturdy wooden boards for the shelves and thick, durable ropes to hold them up.
You can find these materials at your local hardware store or repurpose some old wooden planks for an even more authentic look.
Step 2: Measure and Mark
Measure the length and width you want for your shelves, and then mark the spots on the wooden boards where you’ll drill holes for the ropes.
Don’t forget to factor in the space between each shelf to make sure you have enough room for your treasures!
Step 3: Drill, Baby, Drill!
Time to drill those holes! Make sure to use the right-sized drill bit to match the thickness of your ropes.
If you’re using reclaimed wood, be extra careful to avoid any knots or weak spots in the wood.
Step 4: Knot Your Average Shelf
It’s time to give your rustic rope shelves their sea legs! Thread each rope through the holes in the wooden boards, creating a loop on the top side to hang them.
Tie secure knots at the bottom of each shelf to keep them from slipping.
Step 5: Hoist ‘Em Up!
Now comes the exciting part – hoisting your shelves into place! Find the perfect spots on your wall to hang them.
You can use wall anchors and hooks for extra support, especially if you plan to display heavier items on your shelves.
Step 6: Deck ‘Em Out
Your rustic rope shelves are ready to display your treasured decor pieces! Add some beachy accents like seashells, starfish, or driftwood.
You can also showcase potted plants, books, or even a vintage lantern to complete the nautical vibe.
Step 7: Chart Your Course for Style
These rustic rope shelves are so versatile – you can use them in your living room, bathroom, or even as bedside tables! Get creative and switch up the decor according to the seasons or your mood.
Pro Tip: To give your rope shelves a weathered look, you can lightly sand the wooden boards and apply a wash of white or gray paint. This will enhance the rustic charm and add a hint of coastal flair!
Your rustic rope shelves are now ready to sail into your home and transform it into a coastal haven. Whether you’re a seasoned DIYer or a beginner adventurer, this project will have you feeling like a crafting conqueror!
DIY Rustic Decor Ideas #5: Vintage Window Frame Mirror
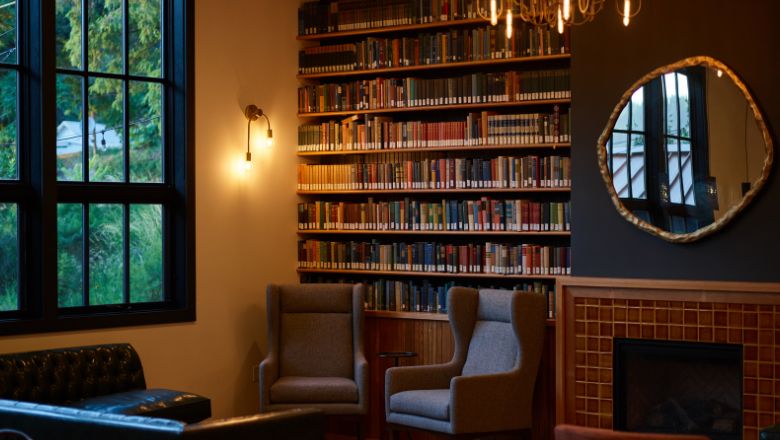
Let’s embark on a time-traveling adventure as we repurpose an old window frame into a stunning vintage mirror that’ll transport you to a bygone era!
Step 1: Treasure Hunting
The first step on this vintage quest is finding the perfect old window frame.
Visit antique shops, flea markets, or even ask your neighbors if they have any hidden gems gathering dust. Remember, the older and more weathered, the better!
Step 2: Clean and Revive
Once you’ve found your vintage treasure, it’s time to give it some TLC! Clean the window frame thoroughly to remove any dirt and grime.
You can use a gentle soap and water solution and a soft cloth. Embrace the vintage character, and don’t worry about every imperfection.
Step 3: Mirror Magic
To turn your vintage window frame into a mirror, you’ll need to get a custom-cut mirror glass that fits snugly within the frame.
Many local glass shops offer custom mirror-cutting services. Get the right measurements and choose the shape that complements your window frame.
Step 4: Backing and Support
To attach the mirror to the window frame, you’ll need a strong backing material. Plywood or MDF (medium-density fiberboard) works well for this purpose.
Cut it to the size of the frame and attach it securely using screws or nails. This will provide the necessary support for your mirror.
Step 5: Framing with Love
Now comes the moment to marry the mirror and the vintage window frame! Lay the mirror on the backing, making sure it fits perfectly within the frame.
Then, carefully attach the frame to the backing, securing it in place. Use wood glue or brackets for extra sturdiness.
Step 6: Time to Antique
To enhance the vintage charm, you can create an antiqued effect on the frame. Apply a coat of antique glaze or use sandpaper to distress the edges and corners.
This will give your mirror an old-world, time-worn appearance that’s sure to impress!
Step 7: Unveiling the Magic
And now, the grand reveal! Hang your vintage window frame mirror with pride. It’ll instantly add character and elegance to any room. Step back and admire the reflection of the past merging beautifully with the present.
Pro Tip: To add a touch of whimsy, consider adding fairy lights around the frame or using it as a charming backdrop for your vanity or entryway table!
You’ve just unlocked the magic of turning an old window frame into a mesmerizing vintage mirror. It’s time to bask in the timeless charm and create a home that’s filled with history, character, and your unique touch!
Rustic Elegance Achieved: Your Home’s DIY Makeover!
From driftwood wall art to reclaimed wood coffee tables, mason jar sconces with fairy lights to rustic rope shelves, and finally, the enchanting vintage window frame mirror – you’ve crafted a home that’s brimming with character and charm!
As you step into each room, you’ll be greeted by the warm embrace of rustic beauty and a touch of nostalgia. Your driftwood art whispers tales of the sea, while your coffee table showcases the rich history of reclaimed wood.
Those mason jar sconces cast a dreamy glow, and the rope shelves add a coastal breeze to the air.
And how can we forget the pièce de résistance – the vintage window frame mirror!
As you gaze into its time-worn reflection, you’ll find yourself transported to an era of grace and elegance. It’s a window into the past, holding secrets of bygone days while reflecting the present.
With each DIY project, you’ve not only added flair to your home but also poured your heart into the creation process. Your home is now an expression of your creativity and a canvas for stories waiting to be told.
