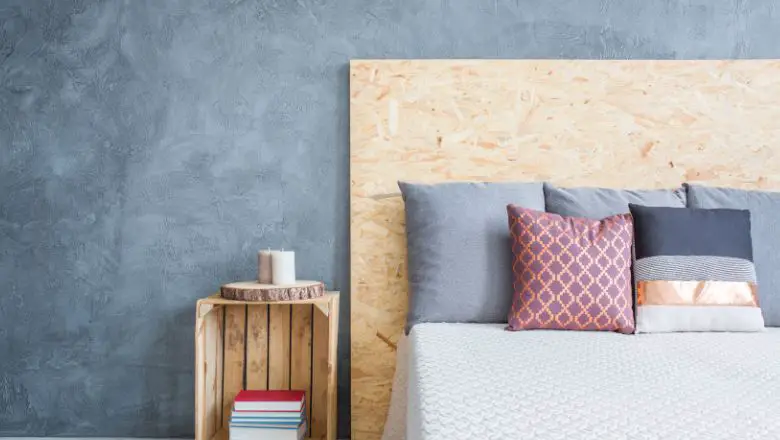
If you’re anything like me, you know that the perfect bedroom can be a total game-changer. But let’s be honest, sometimes we don’t have the budget for those fancy store-bought headboards that leave us dreaming.
That’s where my love for crafting and creativity comes in!
Today, I’m going to spill the beans on my top 5 DIY headboard ideas that have transformed my sleep sanctuary into a cozy paradise without breaking the bank. Get ready to unleash your inner designer and say goodbye to boring bedroom setups.
Let’s dive in and discover how you can add a touch of magic to your bedtime haven with these simple, budget-friendly, and jaw-dropping headboard projects!
Unleash Your Inner Designer With These 5 Creative DIY Headboard Ideas

Unleash your inner designer with these 5 creative DIY headboard ideas and transform your bedroom into a sanctuary of style and comfort.
We all dream of having a bedroom that reflects our unique personality, and what better way to achieve that than by crafting our headboard?
With a dash of creativity and some basic materials, you can turn an ordinary bed into a stunning focal point that will make you want to stay in bed all day.
DIY Headboard Ideas #1: Rustic Reclaimed Wood Charm
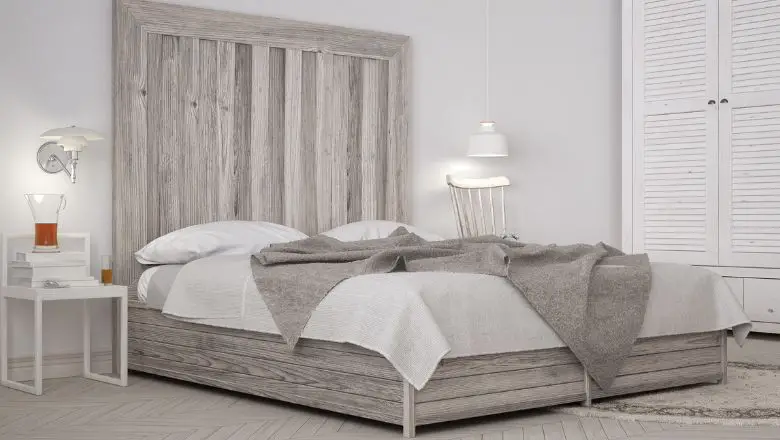
When it comes to adding a touch of cozy charm to my bedroom, nothing quite compares to the allure of the Rustic Reclaimed Wood headboard.
The warm, weathered look of aged wood instantly brings a sense of comfort and nostalgia, creating an inviting atmosphere that makes me look forward to bedtime every night.
There’s something magical about the imperfections and history behind each piece of reclaimed wood, giving the headboard a unique character that store-bought options simply can’t replicate.
Materials Needed
For this DIY headboard project, all you need is a collection of reclaimed wood pieces, sandpaper, wood glue, screws, a saw, and a measuring tape.
The beauty of this DIY headboard is that you don’t need many materials to create a stunning piece that complements your bedroom decor perfectly.
Step-by-Step Tutorial
1. Hunting for Treasure:
My journey begins with the thrill of the hunt, scouring flea markets, salvage yards, and even old barns for discarded wood with the perfect weathered patina. It’s like finding hidden treasure in unexpected places!
2. Measuring and Prepping:
Once I’ve gathered my reclaimed wood pieces, I measure the dimensions of my bed and decide on the height and width of the headboard. This step is crucial to ensure a snug fit and a balanced look.
3. Sanding and Smoothing:
Before assembling the headboard, I give each piece of reclaimed wood a gentle sanding to remove rough edges and splinters, while preserving the rustic texture that makes them so special.
4. Jigsaw Puzzle Time:
With all the pieces sanded and ready, it’s time for the exciting part – arranging them like a jigsaw puzzle! I love experimenting with different layouts until I find the perfect arrangement that speaks to my heart.
5. Assembling with Love:
Once I’m satisfied with the design, I use wood glue and screws to securely attach the wood pieces. This step is a labor of love, and the smell of freshly cut wood adds to the overall experience.
Tips and Variations
- Get Creative with Sizes: Mix and match different sizes of reclaimed wood pieces to add visual interest and depth to the headboard.
- Embrace the Natural Beauty: Avoid over-sanding the wood to preserve its authentic character and rustic charm.
- Personalize with Stains or Paint: If you prefer a different hue, you can stain or paint the wood to match your bedroom’s color scheme or create a focal point with a pop of color.
As you stand back and admire your completed Rustic Reclaimed Wood Charm headboard, you can’t help but feel a sense of pride and accomplishment.
This DIY project not only will save a pretty penny compared to store-bought alternatives but also allow you to infuse your bedroom with a personal touch that perfectly reflects your style.
If you’re looking for a rewarding and creative DIY project to elevate your bedroom, I highly recommend giving the Rustic Reclaimed Wood headboard a try.
DIY Headboard Ideas #2: Upholstered Elegance with a Tufted Twist
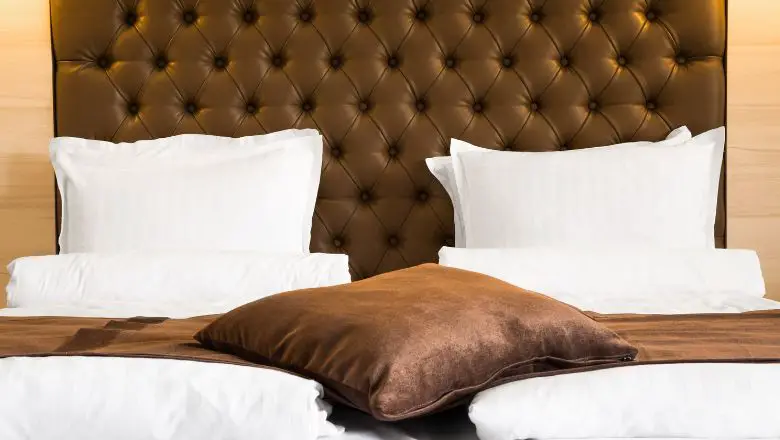
When it’s time to add a touch of sophistication and elegance to your bedroom, there’s nothing quite like an Upholstered headboard with a Tufted Twist.
The plush, luxurious feel of the upholstered fabric creates an instant feeling of coziness and comfort, turning your bed into a regal retreat fit for royalty.
And those tufted details? They add a dash of glamour that will leave you feeling like you’re waking up in a five-star hotel every morning.
Materials Needed
To embark on this dreamy DIY headboard project, you’ll need plywood or MDF board for the base, foam padding, fabric of your choice, buttons for tufting, an upholstery needle, and strong upholstery thread.
Step-by-Step Tutorial
1. Building the Foundation:
I start by measuring and cutting the plywood or MDF board to the desired width and height of my headboard. This becomes the sturdy foundation for my upholstered masterpiece.
2. Padded Perfection:
Next, I layer the foam padding on top of the board, making sure it’s evenly distributed and provides a comfortable backing for the headboard.
3. Wrapping in Elegance:
Now comes the exciting part – wrapping the board and foam with my chosen fabric. I carefully stretch the fabric taut and secure it to the back of the board, ensuring there are no wrinkles or creases.
4. Tufting Time:
To achieve that opulent tufted look, I mark the spots where I want the buttons to be placed. Using an upholstery needle and strong thread, I pull the fabric through the foam and board, securing the buttons and creating those charming tufts.
5. Finishing Touches:
With the tufting complete, I double-check everything to make sure it’s secure and that the fabric is smooth and beautifully draped.
Tips and Variations
- Fabric Selection: Experiment with different textures and patterns to find the fabric that complements your bedroom’s aesthetic and feels soft to the touch.
- Tufting Patterns: Create various tufting patterns like diamond or square shapes to add a unique twist to your headboard.
- Nailhead Trim: For an extra touch of elegance, consider adding nailhead trim around the edges of the headboard.
As you sink into the plushness of your finished Upholstered headboard with a Tufted Twist, you can’t help but feel like you’re drifting away in a cloud of comfort.
This DIY project will truly transform your bedroom into a luxurious oasis where you can unwind and recharge in style.
Whether you’re leaning back with a good book or simply enjoying the view of your beautifully crafted headboard, every moment spent in your bed will be a delightful experience.
DIY Headboard Ideas #3: Dreamy DIY Macramé Masterpiece
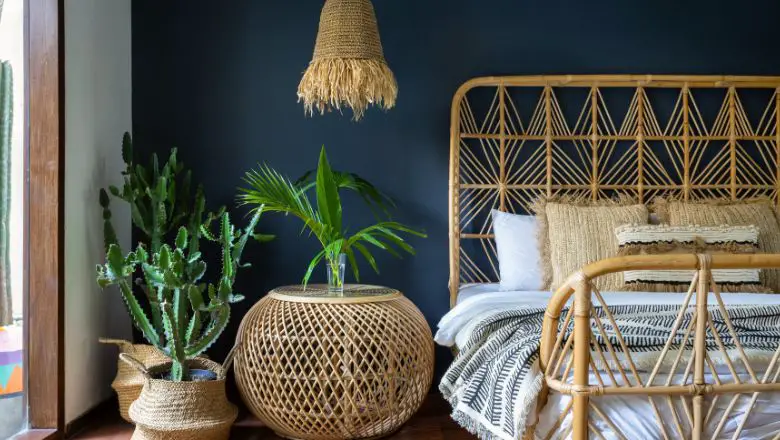
Are you ready to infuse your bedroom with bohemian charm and a touch of whimsy? Look no further than the Dreamy DIY Macramé Masterpiece!
This headboard idea adds a delightful boho vibe to your space, instantly transporting you to a cozy, dreamlike realm.
The intricate knots and flowing patterns of macramé create a captivating focal point that brings artistic and free-spirited energy to any bedroom.
Materials Needed
To embark on this macramé adventure, you’ll need a wooden dowel or a sturdy branch as the base, a macramé cord in your preferred color, scissors, and a dowel hanger or a wall-mounting hook.
Step-by-Step Tutorial
1. Finding the Perfect Base:
I begin by selecting a wooden dowel or a branch that suits the size and style I envision for my macramé headboard. It’s essential to choose a sturdy base that can support the weight of the macramé design.
2. Preparing the Cords:
I cut the macramé cord into several long pieces, ensuring they are all of equal length. The number of cords you need depends on the complexity and thickness of the macramé pattern you want to create.
3. Mastering the Knots:
Now comes the fascinating part – tying the macramé knots! I usually start with the basic square knot and work my way up to more intricate patterns like the diagonal double half hitch. Watching the knots take shape is mesmerizing!
4. Weaving the Design:
With the knots forming a beautiful pattern, I carefully weave and intertwine the cords, building the macramé masterpiece one knot at a time. The rhythm of weaving is surprisingly soothing and therapeutic.
5. Hanging with Joy:
Once the macramé design is complete, I hang my creation using a dowel hanger or a wall-mounting hook. The headboard becomes a stunning wall art piece that transforms my bedroom into a bohemian wonderland.
Tips and Variations
- Experiment with Colors: Choose macramé cords in various colors to match your bedroom’s color palette or add a pop of vibrancy.
- Add Tassels and Beads: Elevate the boho charm by incorporating tassels or beads into the macramé design for extra flair.
- Mix and Match Knots: Combine different macramé knots to create a custom design that speaks to your artistic vision.
As you step back to admire your Dreamy DIY Macramé Masterpiece, you’ll feel a sense of pride in the effort you put into crafting this bohemian beauty.
This headboard idea will turn your bedroom into a cozy sanctuary filled with artistic flair and positive energy.
The soft, flowing patterns of macramé will bring a dreamlike quality that makes bedtime feel like an enchanting escape from reality.
DIY Headboard Ideas #4: Vintage Chic – Repurposing Old Doors
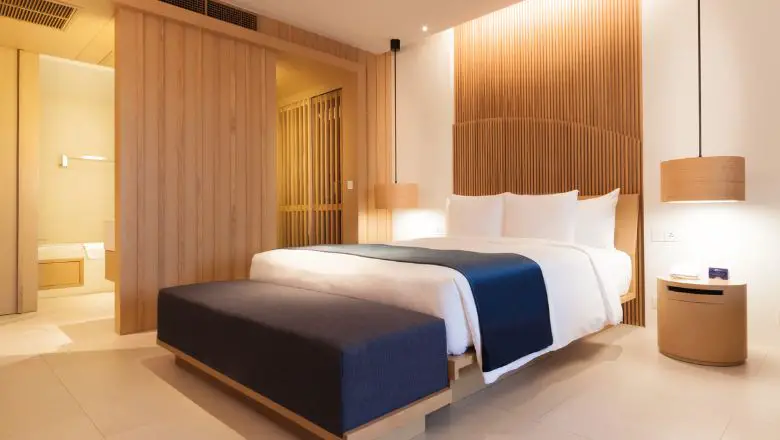
If you’re a fan of all things vintage and love the idea of adding a touch of history to your bedroom, then the Vintage Chic headboard made from Repurposed Old Doors is the perfect choice!
There’s something incredibly charming about giving new life to old, weathered doors that have stood the test of time.
The character and uniqueness they bring to your bedroom create a one-of-a-kind headboard that becomes an instant conversation piece and a nostalgic reminder of the past.
Materials Needed
To embark on this creative journey, you’ll need old doors in varying sizes (depending on the width of your bed), sandpaper, paint or stain, a saw, nails or screws, and a level for mounting the doors.
Step-by-Step Tutorial
1. Scouting for Treasures:
My first step is to hunt for vintage doors that have seen better days but still have that special charm. I explore flea markets, antique shops, and salvage yards, seeking doors with interesting designs or architectural features.
2. Cleaning and Sanding:
Once I have my collection of old doors, I clean them thoroughly to remove any dirt and dust. Next, I gently sand the doors to create a smooth surface while preserving their vintage character.
3. Choosing the Perfect Finish:
Depending on the look I want to achieve, I either apply a fresh coat of paint to match my bedroom decor or use a wood stain to enhance the natural beauty of the doors. The beauty of repurposing old doors lies in the creative freedom to customize their appearance.
4. Building the Headboard:
Now it’s time to arrange the doors side by side to create the headboard. I love the puzzle-like challenge of finding the perfect configuration, ensuring that the doors fit seamlessly together.
5. Securing and Mounting:
Once I’m satisfied with the layout, I securely attach the doors using nails or screws. After mounting the headboard on the wall above my bed, I step back to admire the transformation.
Tips and Variations:
- Embrace the Patina: Don’t be afraid to leave some imperfections on the doors; they add to the vintage charm and character.
- Mix and Match: Combine doors of different colors, shapes, or styles for a more eclectic and bohemian look.
- Headboard with a Story: If you know the history behind the doors you’re repurposing, share the story with guests who admire your headboard.
As you stand in awe of your Vintage Chic headboard made from Repurposed Old Doors, you can’t help but marvel at how these forgotten pieces have become the heart of your bedroom’s decor.
The blend of history, nostalgia, and creativity will transform your sleep space into a vintage oasis that you’ll find irresistible.
Each time you drift off to sleep, you’ll be reminded of the stories these doors carry, filling you with a sense of connection to the past.
DIY Headboard Ideas #5: Whimsical Wall Decal Delight
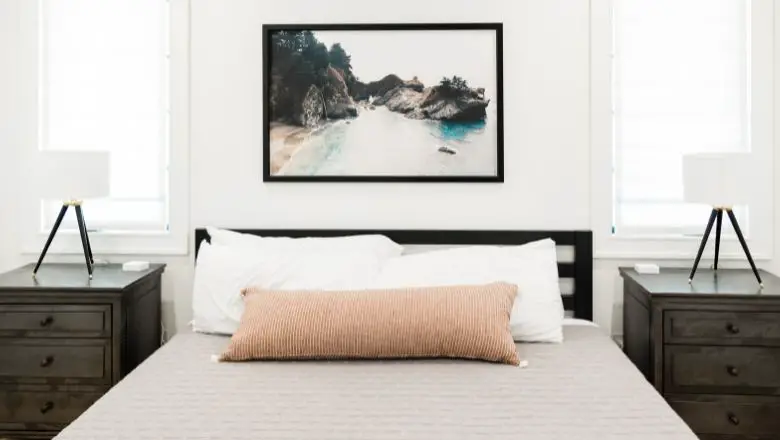
If you’re looking for a headboard idea that’s as charming as it is easy to create, the Whimsical Wall Decal Delight is an absolute winner!
This DIY headboard project embraces the power of creativity without the need for heavy tools or materials.
With a plethora of wall decals available in various designs and styles, you can let your imagination run wild and transform your bedroom into a dreamy wonderland with minimal effort.
Materials Needed
For this delightful project, you’ll need your favorite wall decals, a level, and some painter’s tape for precise placement.
Step-by-Step Tutorial
1. Curating the Perfect Decals:
The first step is to select the wall decals that match your bedroom’s theme and personal taste. Whether it’s floral patterns, geometric designs, or whimsical illustrations, the choices are endless!
2. Planning the Layout:
Before applying the decals, I use painter’s tape to create a mock layout on the wall. This helps me visualize the design and ensures that everything aligns perfectly.
3. Sticking with Precision:
With my plan in place, I start applying the decals one by one, carefully following the manufacturer’s instructions. This step requires a bit of patience, but it’s worth it for the outcome.
4. Layering the Magic:
I love creating depth and dimension by layering different decals or combining them with other decorative elements like fairy lights or small framed artworks.
5. Stand Back and Admire:
Once I’m done applying the decals, I step back to admire the magical transformation. The headboard effect is nothing short of enchanting, and I can’t help but smile every time I see it.
Tips and Variations
- Create a Focal Point: Place a larger, eye-catching decal in the center to create a stunning focal point for your headboard.
- Change with the Seasons: Since decals are easily removable, consider changing them seasonally or whenever you want a fresh look.
- Custom Decals: If you can’t find the perfect decals, consider designing your own and having them printed as custom wall decals.
As you bask in the ethereal beauty of your Whimsical Wall Decal Delight, you’ll be amazed at how such a simple DIY project can have such a big impact on your bedroom’s ambiance.
The whimsy and magic of the decals will transport you to a fairy tale world every time you enter your sleep sanctuary.
This headboard idea is perfect for those who crave creativity and flexibility without the commitment of traditional headboard designs.
Restful Nights, Creative Heights: Embrace DIY Headboard Project!
And, there you have it, my fellow DIY dreamers! I hope you’ve enjoyed this creative journey into the world of DIY headboard ideas as much as I did.
Crafting my headboard has been an absolute game-changer for my bedroom, taking it from ordinary to extraordinary in just a few simple steps.
From the rustic charm of reclaimed wood to the elegance of tufted upholstery, each headboard idea added its touch of magic to my sleep sanctuary. And let me tell you, the satisfaction of lying back against something I created with my own two hands is priceless.
With a little imagination and a sprinkle of creativity, you too can unleash your inner designer and bring your bedtime haven to life. No more cookie-cutter bedrooms, my friends – it’s time to add that personal touch and turn your space into a cozy paradise without spending a fortune.
So, the next time you’re gazing at your bed, envisioning a dreamy headboard to complete the picture, remember that you’ve got the power to make it happen. The possibilities are endless, and the satisfaction of a job well done is immeasurable.
As I bid you farewell on this crafty adventure, I’m already brewing up my next DIY project – and who knows what magic it’ll bring into my life! Until then, keep dreaming, keep creating, and keep making your bedroom a place where bedtime bliss knows no bounds. Happy crafting!
