Are you looking for a fun and creative way to spruce up your home decor game? Look no further than DIY wood pallet projects!
These versatile and inexpensive materials can be transformed into stunning and unique pieces of furniture, wall decor, and more.
As someone who loves to experiment with DIY projects, I can attest to the power of wooden pallets.
Not only are they eco-friendly by repurposing materials that might otherwise go to waste, but they also add a rustic and charming touch to any space.
In this post, I’ll share 5 of my favorite DIY wood pallet projects that have transformed my home decor.
From a chic coffee table to a stylish accent wall, these ideas are sure to inspire you to get creative and try something new.
So, whether you’re a seasoned DIYer or a beginner looking for a fun project, keep reading to discover how wooden pallets can elevate your home decor game to the next level.
Let’s get started!
Get Creative with These 5 DIY Wood Pallet Projects for Home Decor
Are you looking to spruce up your home decor without breaking the bank?
Look no further than these 5 DIY wood pallet projects! I’ve personally tried each of these projects and can attest to their ability to completely transform a room.
Project 1: Rustic Wall Shelf
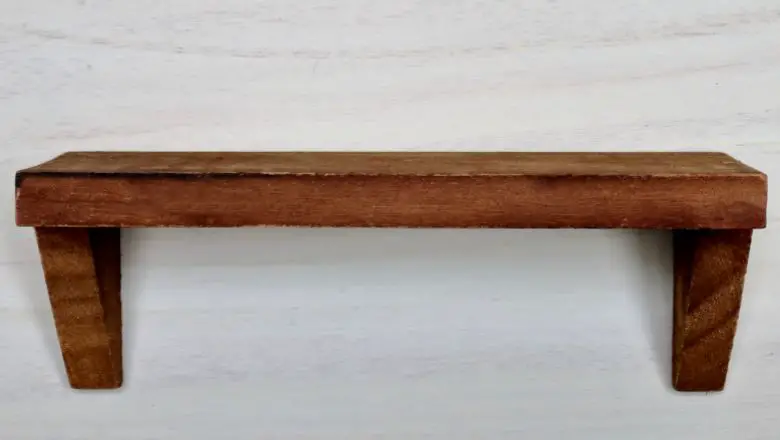
Looking for a simple and stylish way to add some extra storage to your home?
Look no further than the rustic wall shelf! This easy-to-build project can be completed in just a few hours and will add a touch of rustic charm to any room.
Whether you’re looking to store books, display family photos, or keep your favorite knick-knacks on display, a rustic wall shelf is a great option.
To get started, consider the style of your home and choose a design that complements your existing decor.
Some popular options include floating shelves, ladder shelves, and corner shelves. You can also experiment with different finishes and colors to create a unique look that reflects your style.
Materials
- 1x8x6 board
- Sandpaper (medium and fine grit)
- Stain or paint of your choice
- Wall brackets
- Screws
- Wall anchors
Tools
- Saw
- Drill
- Screwdriver
- Measuring tape
- Pencil
Instructions
- Begin by cutting your board to the desired length for your shelf. You can use a saw to make the cuts, and be sure to sand the edges with medium grit sandpaper to smooth them out.
- Sand the entire board with fine-grit sandpaper to create a smooth surface for staining or painting.
- Apply your stain or paint according to the manufacturer’s instructions. Be sure to work in a well-ventilated area and use a brush or rag to apply an even coat. Allow the shelf to dry completely.
- Once the shelf is dry, attach the wall brackets to the back of the shelf using screws. Be sure to space them evenly along the length of the shelf.
- Use a measuring tape and pencil to mark where you want to install the shelf on the wall. Use a drill to create holes for the wall anchors, then insert the anchors.
- Use a screwdriver to attach the wall brackets to the wall anchors, making sure the shelf is level.
Finishing options and tips
Once your shelf is installed, you can add some finishing touches to make it even more stylish. Consider adding a layer of clear coat to protect the finish, or sanding the edges slightly for a distressed look. You can also add some decorative brackets or hooks to hold items on the shelf.
Overall, building a rustic wall shelf is a simple and fun project that can be customized to fit your style. Give it a try and see how it can add some extra storage and charm to your home!
Project 2: Pallet Garden
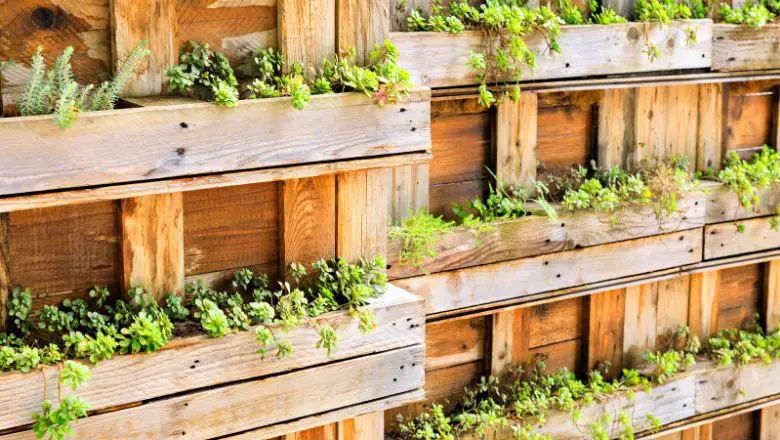
If you love gardening but don’t have much space, consider building a pallet garden!
This project is a great way to create a small but functional garden in a limited area. Whether you want to grow vegetables, herbs, or flowers, a pallet garden can be customized to suit your needs.
To get started, consider the size and style of your space.
You can use a single pallet for a small garden, or stack multiple pallets for a larger garden. You can also experiment with different plant arrangements to create a unique look.
Materials
- Pallet(s)
- Landscape fabric
- Potting soil
- Plants or seeds of your choice
Tools
- Staple gun
- Scissors
Instructions
- Begin by cleaning your pallet(s) and removing any nails or staples. You can use a pry bar to remove any stubborn pieces.
- Once the pallet is clean, lay it flat and cover the back and bottom with landscape fabric. Use a staple gun to secure the fabric in place, making sure it is taut and covers the entire area.
- Fill the pallet with potting soil, making sure to press the soil firmly into each compartment. You may need to add more soil as you go to ensure each compartment is full.
- Once the soil is in place, it’s time to plant! Use a pair of scissors to cut small holes in the landscape fabric where you want to plant. Add your plants or seeds, and cover with additional soil as needed.
- Water your garden thoroughly, making sure each compartment is evenly moist.
Tips for choosing plants and maintaining your pallet garden
When choosing plants for your pallet garden, consider the amount of sunlight your space receives and choose plants accordingly. You can also experiment with different plant combinations to create a unique and interesting look.
To maintain your garden, be sure to water it regularly and monitor for pests or diseases. You may need to fertilize your plants periodically to keep them healthy and thriving.
Overall, a pallet garden is a fun and easy way to create a small garden in a limited space. Give it a try and see how it can add some greenery and beauty to your home!
Project 3: Pallet Coffee Table
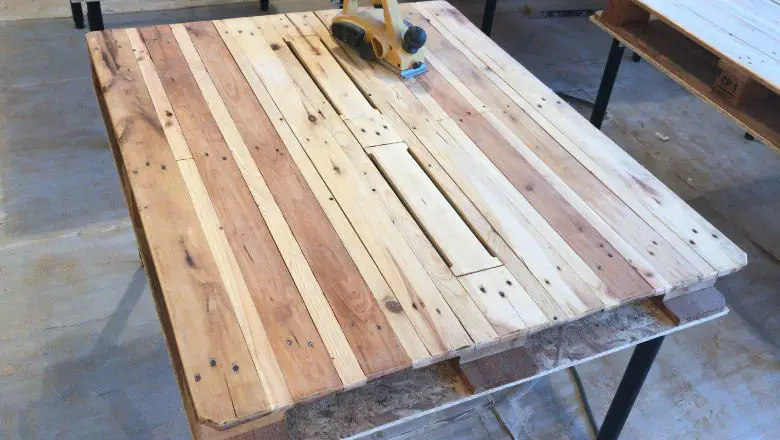
If you’re looking for a unique and rustic addition to your living room, consider building a pallet coffee table! This project is a great way to add some character to your home while also being functional.
When it comes to design ideas, there are many possibilities. You can choose to keep the pallets in their natural state or add a stain or paint for a more polished look. You can also experiment with different leg designs to create a table that is truly your own.
Materials
- Pallets (2-3 depending on the size of your table)
- 4 hairpin legs (or other leg design of your choice)
- Screws
- Sandpaper
- Stain or paint (optional)
Tools
- Saw
- Drill
- Screwdriver
- Sanding block
Instructions
- Begin by cleaning and sanding your pallets. You can use a sanding block or an electric sander to smooth out any rough spots.
- Once your pallets are clean and sanded, cut them down to size. You can use a circular saw or a handsaw for this step. Make sure to measure carefully to ensure your table is the desired height and length.
- Once your pallets are cut down to size, it’s time to attach them. Use screws to secure the pallets together, making sure they are level and sturdy.
- Once your pallets are attached, it’s time to add the legs. Screw in the hairpin legs or other leg designs of your choice, making sure they are evenly spaced and level.
- If desired, you can add a stain or paint to your table for a more polished look. Be sure to allow ample drying time before using your table.
Finishing options and tips
When it comes to finishing your pallet coffee table, there are many options. You can leave it in its natural state for a rustic look, or add a stain or paint for a more polished look. You can also experiment with different leg designs to create a table that is truly your own.
To maintain your table, be sure to clean it regularly with a damp cloth and avoid placing hot or heavy items on it. With proper care, your pallet coffee table can be a functional and unique addition to your home.
Project 4: Pallet Swing Bed
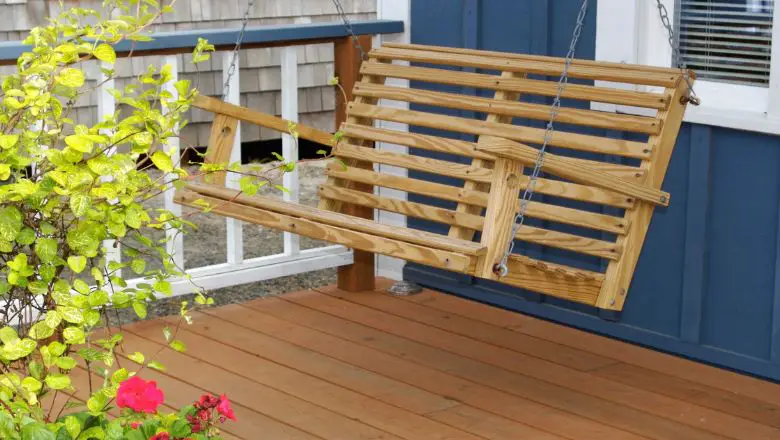
A pallet swing bed is a perfect addition to any outdoor space, providing a relaxing and comfortable spot to lounge and enjoy the fresh air. This project is a great way to upcycle pallets and create a unique and functional piece of furniture.
When it comes to design ideas, there are many possibilities. You can choose to keep the pallets in their natural state or add a stain or paint for a more polished look. You can also experiment with different rope designs or add a cushion for extra comfort.
Materials
- 4 pallets
- Rope (at least 50 feet)
- 4 eye bolts
- Carabiners
- Cushion (optional)
Tools
- Saw
- Drill
- Sanding block
Instructions
- Begin by cleaning and sanding your pallets. You can use a sanding block or an electric sander to smooth out any rough spots.
- Once your pallets are clean and sanded, cut them down to size. You can use a circular saw or a handsaw for this step. Make sure to measure carefully to ensure your swing bed is the desired length and width.
- Once your pallets are cut down to size, it’s time to attach them. Use screws to secure the pallets together, making sure they are level and sturdy.
- Once your pallets are attached, it’s time to add the eye bolts. Drill four holes at the corners of the swing bed and attach the eye bolts. Be sure to use a level to ensure the swing bed hangs evenly.
- Cut four lengths of rope at least 12 feet long. Attach one end of each rope to an eye bolt using a carabiner.
- Once your ropes are attached, tie them together at the top using a strong knot. You can also add a cushion for extra comfort.
- Hang your swing bed from a sturdy tree branch or pergola using the remaining carabiner.
Tips for hanging and maintaining your swing bed
When hanging your swing bed, it’s important to choose a sturdy branch or pergola. Be sure to check the weight limit of the rope and hardware you are using to ensure it can safely support the weight of the swing bed and anyone using it.
To maintain your swing bed, be sure to clean it regularly with a damp cloth and avoid leaving it out in the rain or harsh weather conditions. With proper care, your pallet swing bed can provide a comfortable and relaxing spot to enjoy the outdoors.
Project 5: Pallet Bookshelf
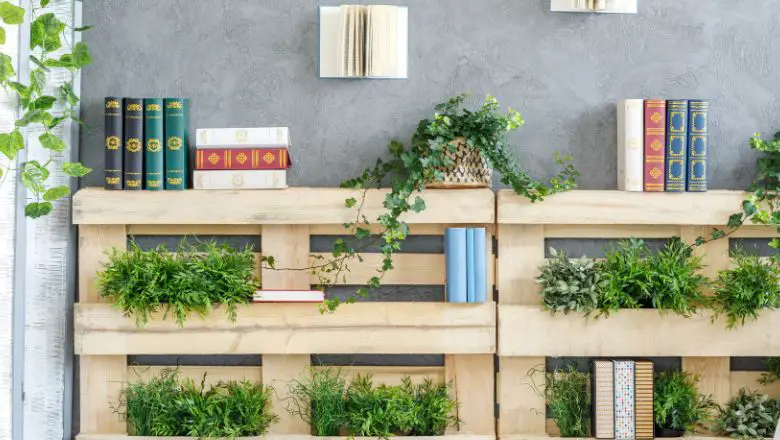
A pallet bookshelf is a unique and eco-friendly way to add some rustic charm to your home while also providing functional storage space for your favorite books. The beauty of this project is that it can be customized to fit your specific space and design preferences.
When it comes to design ideas, you can choose to keep the pallets in their natural state or add a stain or paint for a more polished look. You can also experiment with different arrangements and sizes of the pallets to create a unique and functional bookshelf.
Materials
- 2-3 pallets
- Saw
- Sanding block
- Screws
- Level
- L-brackets
Tools
- Circular saw or handsaw
- Drill
Instructions
- Begin by cleaning and sanding your pallets. You can use a sanding block or an electric sander to smooth out any rough spots.
- Once your pallets are clean and sanded, cut them down to size. Use a circular saw or handsaw to cut the pallets to the desired length and width.
- Once your pallets are cut down to size, it’s time to attach them. Use screws to secure the pallets together, making sure they are level and sturdy.
- Once your pallets are attached, it’s time to mount the bookshelf to the wall. Use L-brackets to secure the bookshelf to the wall at the desired height.
- You can also add extra shelves to your bookshelf by cutting down additional pallets and attaching them to the sides of the bookshelf.
Finishing options and tips
To give your pallet bookshelf a polished look, you can add a stain or paint in your desired color. You can also experiment with different arrangements and sizes of the pallets to create a unique and functional bookshelf.
When hanging your bookshelf, be sure to use L-brackets and secure them to a stud in the wall for added stability. You can also use drywall anchors for added support.
With these simple steps, you can create a unique and eco-friendly bookshelf that adds both style and function to your home.
Transform Your Space with These 5 Easy DIY Wood Pallet Projects
In conclusion, DIY wood pallet projects are a fantastic way to transform your home decor game without breaking the bank.
By repurposing materials that might otherwise go to waste, you can create unique and stylish pieces that add a charming and rustic touch to any space.
From coffee tables to accent walls, the possibilities are endless when it comes to wood pallet projects.
Whether you’re a seasoned DIYer or a beginner looking for a fun project, I encourage you to try out these ideas and get creative with wooden pallets.
Not only are these projects eco-friendly and affordable, but they also allow you to express your style and create one-of-a-kind pieces that you can be proud of.
So, don’t settle for boring home decor – get your DIY on and let wooden pallets elevate your space to the next level!
