Can you feel the magic in the air? I sure can! And you know what that means — it’s time to get our DIY on and sprinkle some enchantment into our homes this Christmas!
I don’t know about you, but I adore the idea of crafting my decorations. It adds a personal touch that you just can’t buy in stores.
So, grab your hot cocoa and put on your creative cap, because today, I’m going to share 5 fantastic and easy-peasy DIY white Christmas decorations that’ll make your home shine like freshly fallen snow.
You might be thinking, “DIY? Oh, that sounds complicated!” But trust me, it’s a piece of cake (or should I say gingerbread cookie?).
Even if you’re not the craftiest of elves, these ideas are so simple and fun, you’ll be dashing through the snow with joy in no time.
From snowy wreaths that greet your guests with winter wonder to elegant snowflake garlands that twinkle above your fireplace, we’ve got it all covered.
So, stick around, my merry mate, and let’s deck the halls together with these DIY white Christmas decorations that are sure to fill your home with the spirit of the season.
5 Enchanting DIY White Christmas Decor Ideas For Home

As the holiday season approaches, there is a magical allure that surrounds us – the thought of a white Christmas.
The sight of pristine snowflakes falling gently from the sky, creating a winter wonderland, evokes feelings of joy and nostalgia.
To capture this enchanting spirit within the comfort of our homes, why not embark on a DIY journey to create stunning white Christmas decor?
The following ideas will transform your space into a whimsical retreat filled with elegance and charm.
Snowy Snowflake Wreath

Get ready to welcome the winter wonderland into your home with our delightful Snowy Snowflake Wreath!
It’s the perfect DIY project to add a touch of magic to your holiday decor. You won’t believe how easy and fun it is to make this enchanting masterpiece.
Materials Needed
- Plain wreath (can be foam or twig-based)
- White acrylic paint or spray paint
- Assorted snowflake embellishments (you can find these at craft stores)
- Glue gun and glue sticks
- Ribbon or twine for hanging
Step-by-Step Instructions
- Start by giving your plain wreath a frosty makeover. Using white acrylic paint or spray paint, cover the entire wreath in a snowy hue. Let it dry completely; this will be your snowy canvas!
- Now comes the exciting part! Arrange the snowflake embellishments on the wreath to create a captivating pattern. Play around with different sizes and shapes to achieve the perfect balance.
- Once you’re happy with the arrangement, use your trusty glue gun to attach the snowflakes firmly to the wreath. Be careful not to burn your fingers – we need them for more crafting!
Tips for a Stunning Finish
- If you can’t find pre-made snowflake embellishments, don’t worry! You can cut snowflakes out of white cardstock or use snowflake-shaped stickers for a quick and effortless option.
- Add a touch of sparkle by dusting the wreath with some iridescent glitter. It’ll twinkle like freshly fallen snow!
Final Result and How to Hang
Now, take a step back and admire your snowy creation! This Snowy Snowflake Wreath will add a whimsical touch to your front door or anywhere inside your home.
To hang it on your front door, simply attach a festive ribbon or twine to the top of the wreath and loop it over a hook or nail. Alternatively, you can lean it against a mantel or hang it on a blank wall for a charming focal point.
There you have it, my creative friend – your very own Snowy Snowflake Wreath! It’s a delightful addition to your holiday decor that will make your heart merry and bright.
Whimsical Snowflake Garland

Time to let your imagination take flight with our delightful Whimsical Snowflake Garland! This DIY project will turn any ordinary space into a dreamy winter escape.
The best part? You can customize it to match your unique style and taste. Let’s dive into the magic of crafting this enchanting garland!
Materials Needed
- White paper or cardstock
- Snowflake templates (you can find these online or create your own)
- Scissors
- String or twine
- Glue or tape
Step-by-Step Instructions
- Begin by tracing and cutting out snowflake shapes from white paper or cardstock. You can make various sizes and designs to add a whimsical touch to your garland.
- Once you have a delightful collection of snowflakes, it’s time to assemble the garland. Take your string or twine and measure how long you want the garland to be. Leave a little extra on each end for hanging.
- Lay out the snowflakes in your desired pattern along the string. Experiment with different arrangements until you find the one that speaks to your winter-loving heart.
- Now, attach the snowflakes to the string using glue or tape. Make sure they are securely fastened so that they won’t flutter away with the slightest winter breeze.
Customization Ideas
- Add a touch of shimmer by sprinkling some glitter on the snowflakes before attaching them to the string. This will make them glisten like real snow under twinkling lights.
- Incorporate pops of color by using colored paper or adding small colorful beads between the snowflakes for a playful twist.
Styling the Garland in Your Home
With your Whimsical Snowflake Garland ready to dazzle, the possibilities are endless! Here are some delightful ways to style it in your home:
- Drape it across your mantel for a charming winter display.
- Hang it above your bed for sweet dreams of snowy landscapes.
- Adorn your Christmas tree with the garland for a whimsical touch.
- Use it as a backdrop for your holiday photos – perfect for spreading winter joy on social media.
Get ready to be captivated by the magical charm of your very own Whimsical Snowflake Garland. This DIY creation will infuse your home with the spirit of the season and add a touch of frosty elegance to your holiday celebrations.
Magical Snow Globe Centerpiece
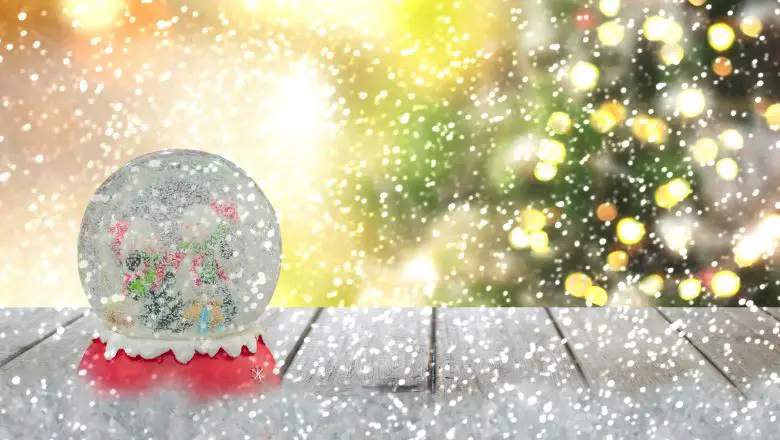
Get ready to bring the enchantment of winter to your holiday table with our captivating Magical Snow Globe Centerpiece!
This DIY project is sure to be the centerpiece of attention and will make your guests feel like they’re stepping into a snow-filled wonderland.
Materials Needed
- Clear glass or plastic jar with a lid (you can use a mason jar or a small fishbowl)
- Miniature figurines or ornaments (choose your favorite winter-themed characters)
- Distilled water
- Glycerin (optional but recommended to make the snowflakes fall more slowly)
- Glitter or fake snow
- Waterproof super glue
Step-by-Step Instructions
- First, select the perfect miniature figurines or ornaments for your snow globe. You can find a wide variety of winter-themed characters like snowmen, reindeer, or even tiny houses. Get creative and choose the ones that warm your heart.
- Using the waterproof super glue, carefully attach the figurines to the inside of the lid. Make sure they are securely glued in place so they don’t float around when you turn the globe upside down.
- Now, it’s time to create the magical snowfall effect! Fill the glass jar about three-quarters full with distilled water. If you prefer a slower snowfall, add a few drops of glycerin to the water. This will make the glitter or fake snowfall more graceful.
- Add a generous sprinkle of glitter or fake snow to the water in the jar. The amount will depend on how snowy you want your scene to be. Experiment with different amounts to achieve your desired effect.
- Carefully screw the lid with the attached figurines onto the jar. Make sure it’s tightly sealed to prevent any leaks.
Adding a Personal Touch
Make your Magical Snow Globe Centerpiece extra special by adding a personal touch:
- Attach a small family photo to the inside of the lid alongside the figurines, so it feels like your loved ones are right in the snow globe scene.
- Write a heartfelt message or quote on a tiny piece of paper and place it inside the jar before sealing it. It will add a touch of magic to the snowfall.
Placing the Snow Globe on Your Dining Table or Mantel
Your Magical Snow Globe Centerpiece is now ready to grace your dining table or mantel with its winter magic! Place it as the focal point of your holiday table setting or add some fairy lights around it to make it truly shine.
With your very own snow globe masterpiece, you’ll be able to bring the spirit of a snowy winter wonderland right into your home. It’s a whimsical addition to your holiday decor that will make your celebrations extra special.
Glittering Snowflake Window Clings

Let’s add a touch of winter wonder to your windows with our Glittering Snowflake Window Clings!
This DIY project will make your home look like it’s nestled in a snowy paradise from the outside and spread the holiday cheer to everyone passing by.
Materials Needed
- White craft foam sheets or white window cling sheets
- Snowflake templates (you can find these online or create your own)
- Scissors
- Glue or clear double-sided tape
- Glitter or fake snow (optional but highly recommended for added sparkle)
Step-by-Step Instructions
- Start by choosing your desired snowflake templates. You can find a variety of designs online or draw your own to make it truly unique.
- Trace the snowflake templates onto the white craft foam sheets or white window cling sheets. If you’re using craft foam, carefully cut out the snowflake shapes. If you’re using window cling sheets, they should already have a sticky back that you can easily peel off.
- If you want to add some extra magic to your snowflakes, this is the perfect time to do it! Sprinkle some glitter or fake snow onto the snowflake cutouts before attaching them to your windows. It will make them sparkle like real snow!
- Use glue or clear double-sided tape to stick the snowflakes onto your windows. Arrange them in various patterns and sizes to create a whimsical flurry effect.
Removing and Reusing the Clings
One of the best things about these Glittering Snowflake Window Clings is that they are easily removable and reusable! Simply peel them off gently from the window surface and store them flat between pieces of wax paper or plastic wrap until next winter.
Decorating Your Windows for a Magical View
Now that your windows are adorned with Glittering Snowflake Window Clings, step outside and take in the view of your frosty paradise!
Your home will exude the charm of a winter wonderland, and everyone passing by will be mesmerized by the sparkling snowflakes.
These window clings are not only perfect for decorating your home, but they also make fantastic DIY gifts for friends and family.
Spread the joy of winter magic and let your creativity soar as you adorn windows with these delightful clings.
Your Glittering Snowflake Window Clings are a fantastic addition to your holiday decor, and they will make your home feel like a storybook winter escape.
Snowy Pinecone Ornaments

Let’s add a touch of nature’s charm to your Christmas tree with our delightful
Snowy Pinecone Ornaments! This DIY project will bring the beauty of the outdoors inside your home and infuse your tree with a cozy, rustic vibe.
Materials Needed
- Pinecones (gather them from your backyard or purchase them from a craft store)
- White acrylic paint
- Glitter or fake snow
- Twine or ribbon for hanging
- Hot glue gun and glue sticks
Step-by-Step Instructions
- Begin by preparing your pinecones. Make sure they are clean and free of any debris. You can also bake them in the oven at a low temperature for a few minutes to ensure they are completely dry and ready for crafting.
- Time to turn those pinecones into snowy wonders! Using white acrylic paint, carefully paint the tips of each pinecone’s scales. This will create a frosty, snowy effect. Don’t worry about being too precise – a little imperfection adds to the charm!
- While the paint is still wet, sprinkle glitter or fake snow over the painted tips. You can use a brush or your fingers to gently pat the glitter into place. This will make your pinecones glisten like freshly fallen snow!
- Once the paint and glitter have dried, it’s time to add the finishing touch. Attach a loop of twine or ribbon to the top of each pinecone using a hot glue gun. This will allow you to hang your Snowy Pinecone Ornaments on the Christmas tree.
Hanging Your Pinecone Ornaments on the Christmas Tree
Now that your Snowy Pinecone Ornaments are ready, it’s time to adorn your Christmas tree with its rustic charm!
Simply hang them on the branches using the attached twine or ribbon. You can mix and match them with other ornaments or string them together to create a charming garland.
Using Them as Napkin Rings for Your Holiday Table Setting
These Snowy Pinecone Ornaments aren’t just for the tree! They also make wonderful napkin rings for your holiday table setting.
Simply tie them around rolled napkins with a piece of twine or ribbon. Your guests will be delighted by the thoughtful and nature-inspired touch.
Get ready to be enchanted by the beauty of your very own Snowy Pinecone Ornaments. They’ll add a touch of rustic elegance to your holiday decor and bring the joy of the outdoors into your home.
Wrap-Up: Embrace the Snowy Splendor with These DIY White Christmas Decorations
By now you’ve transformed your home into a breathtaking winter wonderland. Just imagine the delight on your guests’ faces as they step into your cozy abode, greeted by the enchanting charm of your DIY white Christmas decorations.
Remember how we took that plain wreath and turned it into a snowflake spectacle?
And oh, the joy of crafting those delicate snowflake garlands that now dance above your fireplace! Your home is truly adorned with the beauty of winter.
But let’s not forget the pièce de résistance — the snow globe centerpiece! With a little ingenuity and a touch of glitter, you’ve created a captivating centerpiece that steals the show.
I bet your friends will be begging for your DIY secrets!
