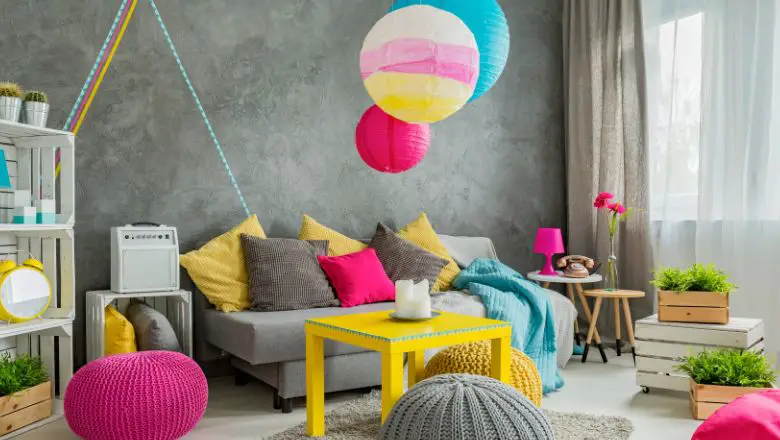
Are you ready to embark on a wallet-friendly journey to spruce up your living space and turn it into a cozy haven?
Well, you’ve come to the right place! I’ve got a treasure trove of DIY home decor ideas that will leave you amazed and your bank account intact.
Trust me; I’ve been there, and I know just how thrilling it is to transform your space without breaking the bank.
So, grab your crafting supplies, and let’s dive into these 5 stunning DIY home decor ideas that will have you wondering why you didn’t try them sooner. Let’s get started!
From Dull to Dazzling: 5 Affordable DIY Home Decor Ideas to Try Today
Are you tired of your home’s lackluster appearance? Are you looking for ways to spruce up your living space without breaking the bank? Look no further!
Below, I will share with you five affordable DIY home decor ideas that can transform your dull space into a dazzling sanctuary. These ideas are easy to execute and require minimal investment, making them perfect for anyone on a budget.
DIY Macrame Wall Hanging: Elevate Your Space with Boho Vibes
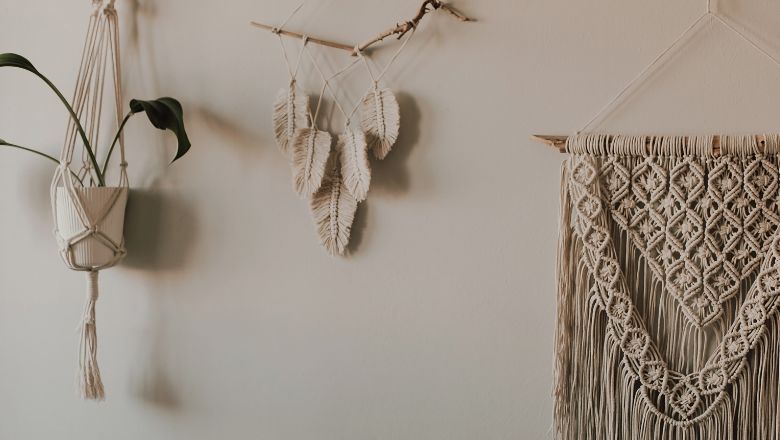
If you’re longing to add a boho-inspired touch to your living space, I’ve got the perfect DIY project for you—creating your mesmerizing macrame wall hanging!
Trust me, this creative endeavor will not only bring nature’s elegance indoors but also infuse your space with a unique sense of style.
What you’ll need:
- A roll of soft and sturdy macrame cord ensures a beautiful drape.
- A wooden dowel or a sturdy branch serves as the foundation for your masterpiece.
- A pair of sharp scissors—your trusty sidekick in this crafting adventure.
Step-by-step guide:
1. Begin by securing the starting knot:
Fold your macrame cord in half, forming a loop, and place it over the wooden dowel. Bring the loose ends through the loop and gently pull them to tighten. Voila! You’ve got your starting point.
2. Get crafty with the knots:
Now, it’s time to create the magic! Embrace your inner artist and start experimenting with various macrame knots. The half-square knot, square knot, and diagonal double half-hitch knot are just a few options to explore. Mix and match these knots to form intricate patterns and textures, or keep it simple with a repetitive design—the choice is yours!
3. Trim with precision:
Once you’ve achieved your desired length and design, it’s time to add those finishing touches. Grab your trusty scissors and carefully trim any excess cord to ensure a neat and polished look.
And there you have it—your very own macrame wall-hanging masterpiece! Now comes the best part: find the perfect spot to display your creation and watch as it instantly transforms your space into a boho-inspired haven.
Don’t forget to let your creativity flow freely during this crafting journey. Feel free to experiment with different cord colors, add decorative beads or tassels, and let your imagination run wild!
Are you ready to embrace the art of macrame and create a stunning piece of decor that’s uniquely you? Let your fingers work their magic and watch as your space comes alive with boho vibes and handmade charm. Happy crafting!
Upcycled Wine Cork Bulletin Board: Pin Your Way to Eco-Chic Organization!
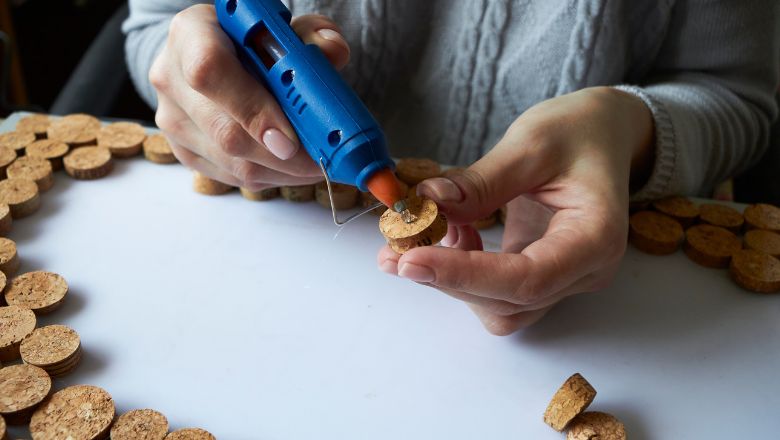
Are you searching for a practical yet eco-friendly DIY project? Look no further, because we’ve got an upcycling idea that will leave you sipping on creativity! Get ready to transform those saved wine corks into a chic bulletin board that’s perfect for organizing your notes, photos, and to-do lists.
What you’ll need:
- Gather all those wine corks you’ve been collecting (kudos for being eco-conscious!).
- Grab your trusty hot glue gun—a crafting essential for this project.
- Find an old picture frame or a wooden frame with a backing—this will be the base for your bulletin board.
Step-by-step guide:
1. Arrange and glue:
Start by arranging your wine corks in a pattern that tickles your fancy. Once you’re satisfied with the layout, fire up that glue gun and secure each cork onto the frame’s backing. Take your time to ensure they’re firmly in place.
2. Play with patterns:
This is where you can let your creative juices flow! Play with different cork orientations to create eye-catching patterns. You can go for a classic checkerboard design or even spell out inspiring words—your bulletin board, your rules!
3. Polish it off:
After all your corks are glued and your design is complete, give your bulletin board a final inspection. Secure any loose corks, and if you’re feeling extra fancy, add a touch of paint or varnish to give your creation a polished finish.
Now, step back and admire your handiwork! You’ve just given those wine corks a new life, and now they’re serving as functional art on your wall.
This upcycled wine cork bulletin board not only adds a unique and rustic charm to your space but also sends a message about the importance of mindful crafting and sustainability. Plus, every time you pin a new note or picture, you’ll be reminded of the memories made over those cherished wine-filled evenings.
So, my resourceful DIY-ers, are you ready to uncork your creativity and turn those saved corks into something spectacular? Grab your glue gun and let’s pin our way to an eco-chic and organized home! Happy crafting!
Hand-Painted DIY Rug: Walk on Art with Your Custom Masterpiece!
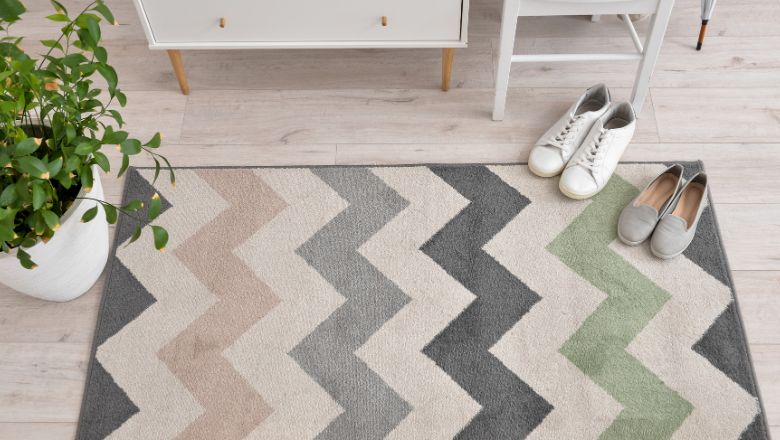
Are you on the hunt for a rug that’s as unique as you are? Look no further, because we’ve got a fantastic DIY project that will have you walking on art—a hand-painted rug that screams creativity and style!
What you’ll need:
- A plain and unadorned rug—pick one in size and shape that fits your space perfectly.
- High-quality fabric paint in your favorite colors—the more vibrant, the better!
- Painter’s tape helps you create clean lines and designs.
Step-by-step guide:
1. Prep your canvas:
Lay out your blank canvas, also known as the plain rug, on a clean and flat surface. Make sure it’s free from dust or any particles that might interfere with your painting process.
2. Map out your design:
Here’s where you can unleash your inner Picasso! Use painter’s tape to create the outlines of your desired patterns or shapes. Whether it’s geometric lines, playful polka dots, or even an abstract masterpiece—let your imagination run wild!
3. Brush on the colors:
Now comes the fun part—painting! Dip your brush into your chosen fabric paint and start filling in the spaces between the taped lines. Feel the joy as the colors come to life and turn your rug into a work of art.
4. Peel off the tape:
Once you’ve painted to your heart’s content and the paint has dried, carefully peel off the painter’s tape. Watch as your crisp lines and bold patterns are revealed, leaving you with a sense of satisfaction and awe.
5. Let it set and enjoy:
Allow your hand-painted rug to dry completely before placing it in its designated spot. Step back and admire your artistic prowess, knowing that every step you took was infused with your creative spirit.
The best part of this DIY rug project? You’ll have a one-of-a-kind masterpiece that’s uniquely tailored to your taste and space! Not to mention, you’ll always have a conversation starter when guests ask about your fabulous floor decor.
Are you ready to step onto your very own hand-painted canvas every day? Grab your brushes, put on your creative cap, and let’s paint our way to a home that reflects the beauty of our individuality.
Revamped Thrift Store Furniture: Give Old Gems a Fresh and Fabulous Makeover!

Are you a firm believer in “one person’s trash is another person’s treasure”? If so, get ready to embark on a thrilling furniture transformation journey.
We’re diving into the world of revamped thrift store furniture, where you can breathe new life into old gems and create show-stopping pieces for your home.
What you’ll need
- Sandpaper in different grits to smooth out the furniture’s surface.
- Your favorite paint color or colors—let your personality shine through your choices.
- A set of paintbrushes in various sizes to handle all the nooks and crannies.
Step-by-step guide
1. Sand it down:
Start by giving your thrift store find a little TLC. Grab your sandpaper and gently sand the furniture’s surface to remove any imperfections, rough spots, or old paint. The smoother the base, the more fabulous your final result will be.
2. Pick your palette:
Now comes the fun part—paint selection! Choose a paint color that resonates with your style and complements your existing decor. Whether it’s a bold statement hue or a calming pastel shade, the choice is yours!
3. Paint with passion:
Grab your paintbrush and start transforming that once-forgotten piece into a stunning work of art. Paint with purpose and precision, and let your creativity guide your brushstrokes. You can opt for a solid color for a clean look or experiment with patterns and designs for a playful touch.
4. Embrace the details:
Don’t forget about the smaller details! If your furniture has intricate carvings or edges, use a smaller brush to accentuate them with contrasting colors or delicate highlights. These tiny touches can elevate the overall look from ordinary to extraordinary.
5. Admire your masterpiece:
Once the paint has dried, step back and admire your revitalized furniture! You’ve successfully turned a thrift store find into a stunning centerpiece that adds character and charm to your home.
Not only will your revamped furniture showcase your creativity and style, but it’ll also be a testament to the joy of giving old items a second chance. Plus, you’ll have a budget-friendly decor solution that’s far from cookie-cutter.
So, are you ready to hit the thrift stores and discover hidden gems that are just waiting for your magic touch? Roll up your sleeves, don your painting apron, and let’s transform the old into extraordinary!
Creative Wall Art with Pressed Flowers: Preserving Nature’s Beauty in Timeless Frames!
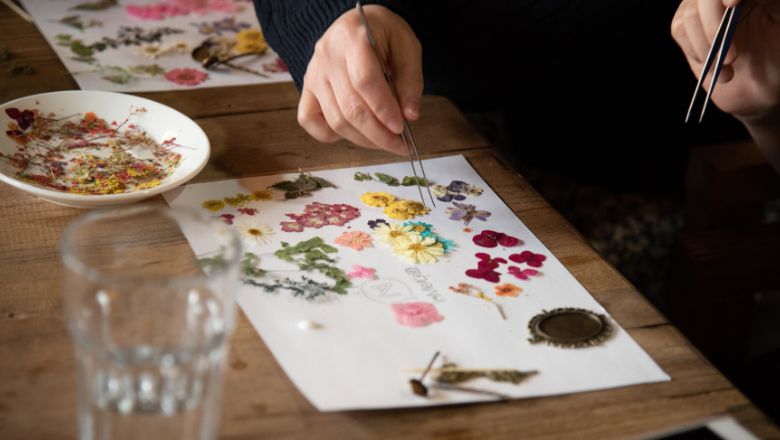
If you find yourself mesmerized by the beauty of flowers and wish to capture their ephemeral charm, this DIY project is made just for you.
Get ready to create enchanting wall art with pressed flowers, turning nature’s fleeting masterpieces into timeless decor.
What you’ll need
- A collection of your favorite flowers—the fresher, the better.
- A heavy book or flower press to preserve the flowers’ delicate beauty.
- Picture frames in various sizes and styles to showcase your pressed botanical treasures.
Step-by-step guide
1. Collect your botanical treasures:
Venture into nature’s wonderland and collect an array of fresh flowers. Choose a mix of blooms with different colors, shapes, and textures—this will add depth and character to your wall art.
2. Press with care:
Lay each flower gently between the pages of a heavy book or a designated flower press. Ensure that the flowers don’t overlap, as you want them to maintain their grace. Now, press the book or flower press with extra weight (more books work wonders) and let time work its magic.
3. Frame with finesse:
Once your flowers have been pressed and dried, it’s time to frame them in all their glory. Select picture frames that complement your decor theme—whether it’s rustic wood, chic metal, or elegant gold. Arrange the pressed flowers inside the frames, securing them gently with tape or glue.
4. Showcase your masterpiece:
Now, it’s time for the grand reveal! Hang your creative wall art in your chosen spot—a gallery wall, hallway, or even as a centerpiece in your living room. Watch as these preserved petals captivate your guests and add a touch of nature’s wonder to your space.
The beauty of pressed flower wall art lies not only in its captivating appearance but also in the sentimental value it holds. Each bloom tells a unique story—a reminder of a special moment, a gift from a loved one, or simply a snapshot of nature’s ever-changing canvas.
Are you ready to embark on a floral adventure and create truly one-of-a-kind wall art? With pressed flowers as your artistic medium, your walls will bloom with beauty and memories that stand the test of time.
DIY Home Decor: Where Budget Meets Style – You’ve Got This!
And there you have it, my fellow decor adventurers! From crafting charming wall art to revamping old furniture, we’ve explored five budget-friendly DIY home decor ideas that have the power to transform your living space into a true masterpiece.
I can’t help but smile as I recall the joy of creating these projects, each one adding its unique touch of personality to my humble abode. With just a little imagination and some basic supplies, I’ve turned my home into a delightful reflection of my style and spirit.
From the moment I hung up that eye-catching macrame wall hanging, I knew I was onto something special. Watching guests marvel at my handcrafted décor, oblivious to its thrifty origins, fills me with a sense of pride and accomplishment.
Who knew that a few cleverly arranged wine corks could become a stylish bulletin board, or that a simple DIY-painted rug could instantly liven up my floors? It’s these small touches that have made a world of difference in my space, making it feel cozy, inviting, and uniquely mine.
Thank you for joining me on this adventure, and remember, your home is your canvas—paint it with love, joy, and a touch of DIY magic! Happy decorating!
