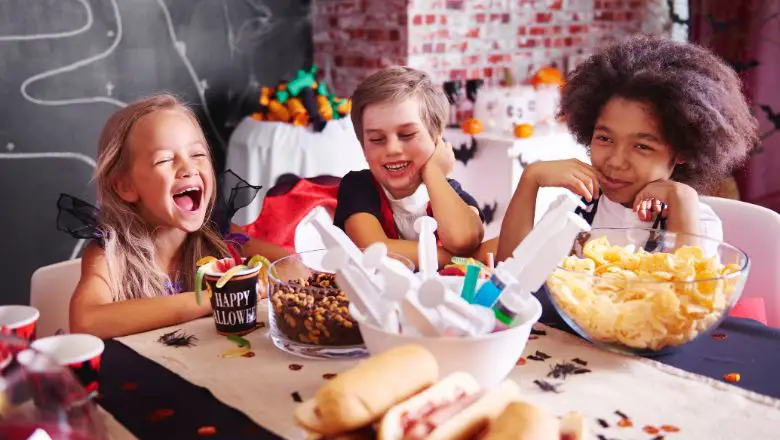
Can you feel that eerie chill in the air?
It’s that time of year when we dust off our cauldrons, hang up our cobwebs, and get ready to throw the spookiest bash in town.
And guess what? This year, I’ve got a treat (no tricks, I promise!) for you that’ll make your little ghouls and goblins jump with delight.
Ever wondered how to transform your ordinary Halloween party into an unforgettable feast that’s both scary and scrumptious?
Well, you’re in for a treat, because I’ve rounded up 5 wickedly fun and utterly delicious Halloween party food ideas that will have your kids squealing with joy.
From creepy-crawly treats that’ll send shivers down their spines to spooky snacks that’ll light up their faces, I’ve got it all covered.
Get Spooky in the Kitchen: 5 Halloween Party Food Ideas for Kids!
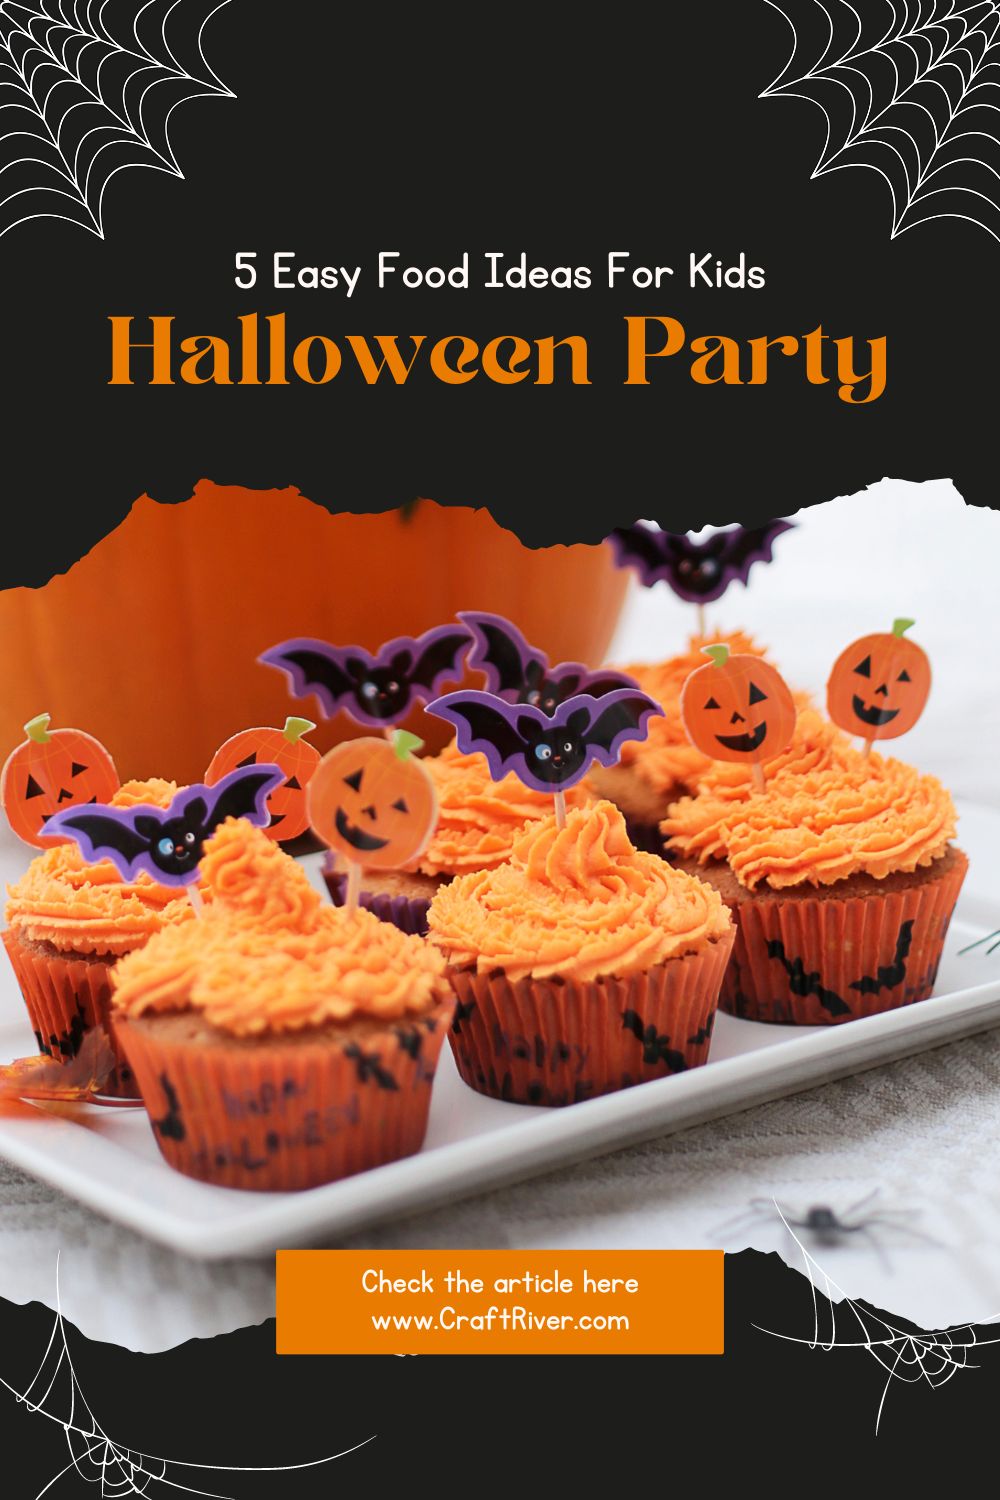
So, what’s on the menu, you ask?
Picture this: mini monster pizzas with gooey cheese and spooky olive eyes, pumpkin-shaped cheesy quesadillas that’ll have your little ones asking for seconds, and don’t even get me started on the graveyard-inspired pudding cups that are a graveyard smash!
And that’s just the beginning – I’ve got a whole cauldron full of other Halloween surprises waiting for you.
But hey, don’t take my word for it – come on in and explore these fang-tastic ideas for yourself!
I’ll walk you through each recipe step by step, making sure you’ve got all the ingredients, tricks, and tips you need to make your Halloween party a screaming success.
So grab your apron and get ready to whip up some spine-tingling treats that’ll leave your little monsters begging for more.
Mini Monster Pizzas: Crafting Creatively Cheesy Creatures
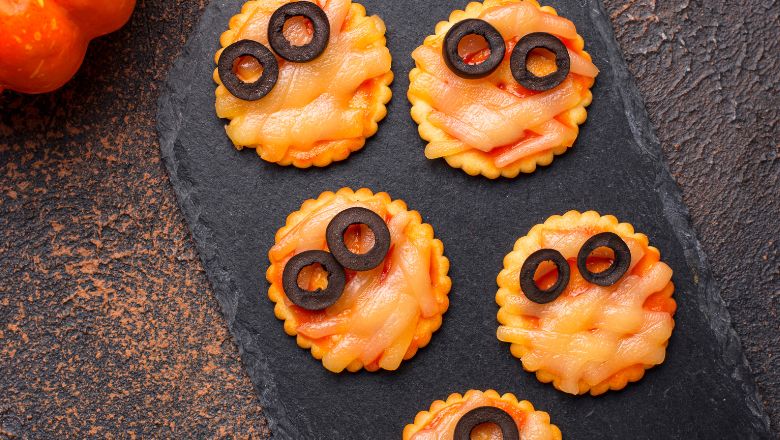
Tummy rumbling? Imagination bubbling?
Let’s dive right in and discover how to whip up these playful and delicious mini monster pizzas that are bound to be the hit of your Halloween bash.
Ingredients You’ll Need:
- Mini pizza dough (store-bought or homemade)
- Tomato sauce or pizza sauce
- Shredded mozzarella cheese
- Assorted toppings: olives, bell peppers, pepperoni, and more
- Olive slices for spooky eyes
Materials You’ll Use:
- Baking sheet
- Rolling pin (if using homemade dough)
- Cookie cutters in monster shapes (or you can freehand your monsters!)
Crafting Your Mini Monster Pizzas:
- Preheat the Oven: Preheat your oven according to the instructions on your pizza dough packaging. You’re heating up for a monstrous treat!
- Roll or Shape Your Dough: If using store-bought mini pizza dough, unroll it onto a floured surface. If you’re feeling extra crafty, roll out your homemade dough to a manageable thickness. Use your cookie cutters to shape your monster bases – get ready for some seriously fun shapes!
- Spread the Sauce: Spread a thin layer of tomato or pizza sauce over each pizza base. This is your canvas for creating cheesy monsters!
- Cheese it Up: Sprinkle a generous handful of shredded mozzarella cheese on top of the sauce. This will make your monsters delightfully gooey and cheesy.
- Create Monster Faces: Time to bring your monsters to life! Use olive slices to create eyes – place them on the pizzas to give your monsters personality. Experiment with different olive sizes for a variety of expressions.
- Top It Off: Get creative with your toppings! Use bell pepper slices to craft snappy smiles, pepperoni slices for wild hair, and any other toppings you fancy to make your monsters truly unique.
- Bake to Perfection: Carefully transfer your mini monster pizzas onto a baking sheet and pop them into the preheated oven. Follow the dough packaging instructions for baking time – usually around 10-12 minutes, or until the cheese is bubbly and golden.
- Serve and Enjoy: Once your mini monster pizzas emerge from the oven, let them cool for a minute before diving in. Serve these cheesy delights to your little goblins and watch their faces light up!
Get Crafty with Mini Monster Pizzas:
Creating these monstrously cheesy delights is a chance to let your imagination run wild.
Play around with different shapes, toppings, and expressions to make each pizza a unique piece of edible art.
Whether your monsters are goofy, spooky, or downright hilarious, the joy is in the crafting and the munching!
These little creatures are not only tasty but a fantastic way to infuse some creativity into your Halloween celebrations.
Pumpkin Palooza: Cheesy Pumpkin Quesadillas
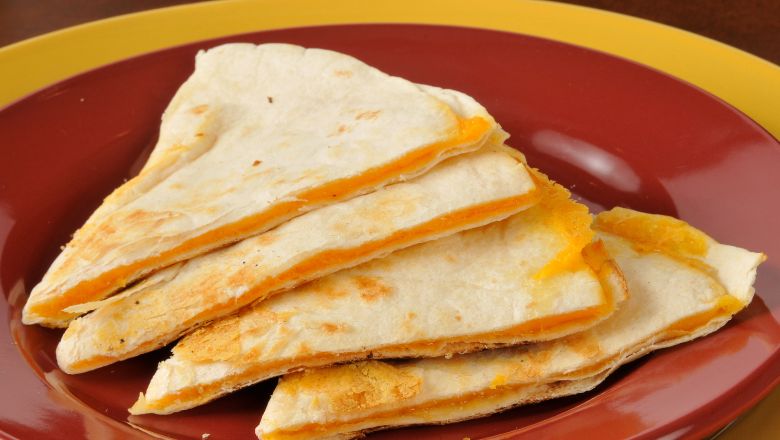
Ready to take your Halloween party food to the next level?
Get ready for a Pumpkin Palooza that will have your taste buds dancing with delight!
Ingredients You’ll Need:
- Flour tortillas (small or medium-sized)
- Shredded cheddar cheese (or your favorite cheese)
- Cooked and mashed pumpkin (canned or fresh)
- Olive oil or butter for cooking
- Optional: spices like cinnamon, nutmeg, and a pinch of salt
Materials You’ll Use:
- Frying pan
- Spatula
Let’s Create Some Pumpkin Magic:
- Prepare Your Pumpkin: Start by cooking and mashing your pumpkin. You can use canned pumpkin puree or cook and mash fresh pumpkin. If using fresh pumpkin, make sure it’s cooled before crafting your quesadillas.
- Season Your Pumpkin: If you’re feeling adventurous, add a pinch of cinnamon and nutmeg to your mashed pumpkin. This will infuse your quesadillas with warm and cozy fall flavors.
- Assemble Your Quesadillas: Lay out your flour tortillas and spread a generous layer of mashed pumpkin on one half of each tortilla. Sprinkle a handful of shredded cheddar cheese over the pumpkin.
- Fold and Heat: Fold the other half of each tortilla over the pumpkin and cheese filling, creating a half-moon shape. Heat a frying pan over medium heat and add a drizzle of olive oil or a dab of butter.
- Cook Until Golden: Carefully place your quesadillas in the pan and cook for about 2-3 minutes on each side, or until they’re golden and crispy, and the cheese has melted into ooey-gooey perfection.
- Serve and Enjoy: Once your quesadillas are beautifully golden and the cheese is melted, transfer them to a cutting board. Let them cool for a moment before slicing them into wedges.
Getting Creative with Your Quesadillas:
Now comes the fun part – getting creative with your cheesy pumpkin quesadillas!
You can serve them as is for a wonderfully comforting treat, or you can take your pumpkin palooza to new heights with some delicious additions.
- Dipping Delights: Serve your quesadilla wedges with a side of salsa, guacamole, or even sour cream for dipping.
- Sweet and Savory: If you’re feeling bold, drizzle a touch of honey over the top for a sweet-savory twist that’s simply irresistible.
- Toppings Galore: Experiment with toppings like chopped green onions, diced tomatoes, or even a sprinkle of pumpkin seeds for some extra crunch.
The beauty of cheesy pumpkin quesadillas lies in their versatility. Whether you’re looking for a quick and comforting snack, a delightful appetizer for your Halloween party, or simply a delicious way to celebrate the season, these quesadillas have got you covered.
Graveyard Goodies: Creepy Pudding Cup Treats
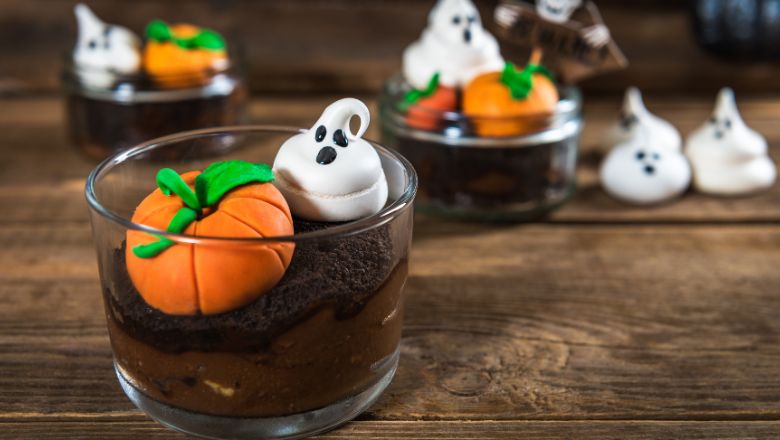
Get ready to venture into the eeriest corner of our Halloween kitchen – it’s time to craft some spine-chilling and mouthwatering Graveyard Goodies!
Ingredients You’ll Need:
- Chocolate pudding cups (store-bought or homemade)
- Chocolate sandwich cookies (like Oreo cookies)
- Gummy worms or other creepy candy
- Edible markers or icing for decorating
- Optional: candy bones or tombstone-shaped treats
Materials You’ll Use:
- Small dessert cups or containers
- Spoon for crushing cookies
- Small decorating tools like toothpicks or mini spatulas
Unearth the Fun:
- Prepare Your Pudding: If you’re using store-bought chocolate pudding cups, you’re already halfway there! If you’re making your chocolate pudding, allow it to cool before assembling your graveyard treats.
- Create the “Dirt”: This is where the fun begins! Take your chocolate sandwich cookies and place them in a zip-top bag. Crush them using a rolling pin or the back of a spoon until they resemble dirt.
- Sprinkle the “Dirt”: Open your chocolate pudding cups and sprinkle a generous layer of crushed cookies on top. This is your edible graveyard “dirt” – a perfect base for your spooky scene.
- Add the Ghoulish Touch: Place gummy worms or other creepy candy on top of the “dirt.” You can have them peeking out, slithering through, or just enjoying their eerie resting place.
- Get Creative with Tombstones: If you have candy bones or tombstone-shaped treats, insert them into the “dirt.” You can also use edible markers or icing to draw your tombstone designs on cookie pieces.
- Final Flourish: Your graveyard treats are almost ready! If you’d like, add a few final touches – perhaps a ghostly gummy, a candy bat, or any other spooky decorations you have on hand.
Serve Up the Spookiness:
Now that your Creepy Pudding Cup Treats are perfectly spookified, it’s time to serve up some chilling joy! Set these ghoulish delights on your Halloween party table or surprise your little ones with a graveyard-themed dessert.
Either way, get ready for giggles and gasps as they dig into these playful and delicious delights.
The beauty of Creepy Pudding Cup Treats is that they’re as much a craft as they are a treat. Feel free to get creative with your graveyard scene – you can add chocolate rocks, candy skeletons, or even create a haunted forest with candy trees.
Witchy Bites: Witches’ Finger Pretzels
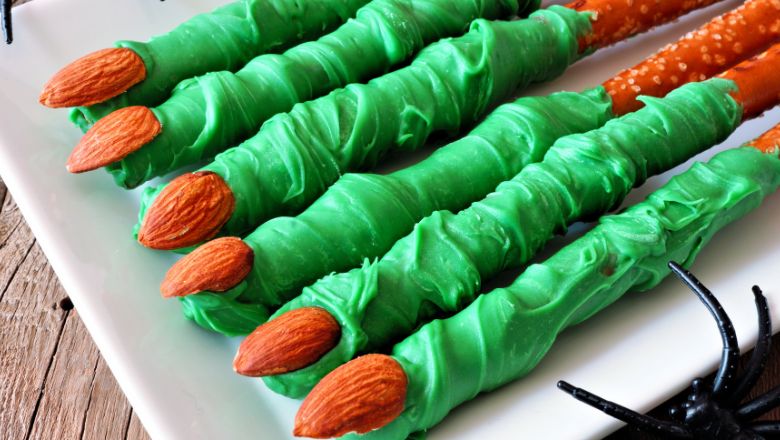
Prepare to enter the enchanting realm of the kitchen where witches’ fingers are no longer the stuff of nightmares, but rather a delectable and delightfully eerie treat that’ll cast a spell on your taste buds.
Get ready for a whimsical journey as we dive into crafting our very own Witches’ Finger Pretzels!
Ingredients You’ll Need:
- Pretzel rod sticks (store-bought)
- Almond slices (for fingernails)
- Egg wash (one beaten egg)
- Coarse salt or sesame seeds (for extra texture)
- Optional: red food coloring or ketchup for a “bloody” effect
Materials You’ll Use:
- Baking sheet
- Pastry brush (for applying egg wash)
- Small knife or kitchen scissors (for shaping)
Creating Witchy Fingers:
- Preheat and Prepare: Preheat your oven according to the instructions on your pretzel packaging. Line a baking sheet with parchment paper or a silicone baking mat.
- Shape the Fingers: Working with one pretzel rod at a time, use a small knife or kitchen scissors to cut a small notch at the end – this is where the almond “fingernail” will go. Gently elongate and shape the rest of the pretzel rod to resemble a finger.
- Add the Almond Nail: Dip an almond slice into the egg wash and press it into the notch you created earlier. This will be the eerie “fingernail.”
- Egg Wash and Salt: Brush the entire pretzel finger with the egg wash, giving it a shiny and golden appearance after baking. Sprinkle coarse salt or sesame seeds over the finger to create texture and a slightly spooky effect.
- Bake and Transform: Place your witchy fingers on the prepared baking sheet and bake according to your pretzel packaging instructions. Watch as they transform into deliciously golden, finger-shaped delights.
- Optional Spooky Effects: If you’re feeling especially playful, you can add a dash of red food coloring to the “nail” area or apply a touch of ketchup after baking to create a “bloody” effect.
Embrace the Witchy Whimsy:
Witches’ Finger Pretzels are all about embracing the playful side of Halloween. Let your imagination run wild as you shape each finger, add the “nails,” and give them their eerie appearance.
The combination of the crunchy pretzel and the almond slice nail creates a treat that’s both tasty and bewitching.
Serving Up Some Magic:
Once your Witches’ Finger Pretzels emerge from the oven, allow them to cool for a moment before serving.
These whimsical treats are perfect for Halloween parties, spooky movie nights, or simply as a delightful conversation starter. Watch as your guests marvel at your witchy culinary prowess!
The best part of crafting Witches’ Finger Pretzels is the laughter and joy they bring. Whether you’re sharing them with friends, family, or little trick-or-treaters, these witchy bites are a fantastic way to infuse some playful creativity into your Halloween celebrations.
Boo-tifully Sweet: Ghostly Banana Ghost Pops
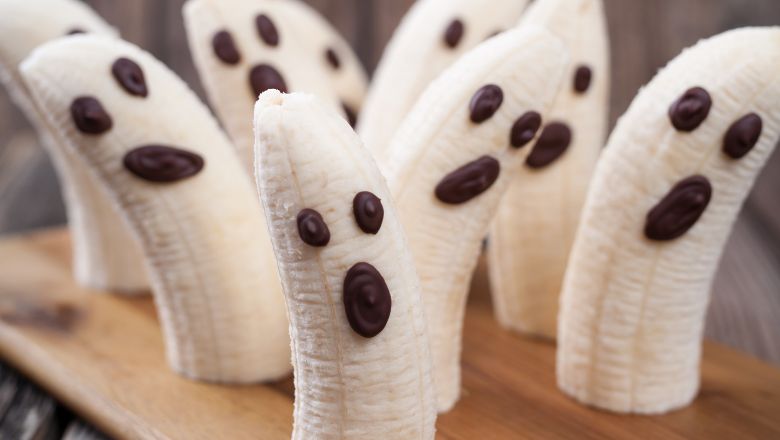
Hold on tight, because we’re about to take a whimsical journey into the world of sweets and spooks!
Ingredients You’ll Need:
- Ripe bananas
- White chocolate chips or white candy melts
- Mini chocolate chips (for eyes and mouth)
- Lollipop sticks or small wooden skewers
- Optional: colored candy melts for decorating
Materials You’ll Use:
- Baking sheet lined with parchment paper
- Microwave-safe bowl for melting chocolate
- Small bowls for holding chocolate and toppings
Spooktacular Banana Magic:
- Prep Your Bananas: Start by peeling and cutting your bananas in half. Insert a lollipop stick or wooden skewer into the cut end of each banana half. These will be the ghostly bodies!
- Melt the White Chocolate: In a microwave-safe bowl, melt your white chocolate chips or candy melts according to the package instructions. Stir until smooth and creamy.
- Dip and Decorate: Dip each banana into the melted white chocolate, allowing the excess to drip off. Place the dipped bananas on the parchment-lined baking sheet.
- Create the Ghostly Shape: While the chocolate is still wet, add mini chocolate chips to create the eyes and mouth of your ghostly pops. The banana itself will be the ghost’s floating body.
- Set and Serve: Place the baking sheet in the refrigerator for a little while to allow the chocolate to set. Once the chocolate is firm, your Boo-tifully Sweet Ghostly Banana Ghost Pops are ready to be enjoyed!
Adding Extra Sweetness:
Feel free to get creative and add some extra sweetness to your ghost pops:
- Colored Drizzles: Use colored candy melts to create fun drizzles or designs on your ghost pops.
- Sprinkle Magic: Sprinkle some edible glitter or colored sprinkles on the wet chocolate for a touch of sparkle and fun.
- Dressed to Impress: If you’re feeling extra creative, you can give your ghosts little chocolate “dresses” or hats using additional melted chocolate.
Unleash Your Inner Ghost Creator:
The beauty of Boo-tifully Sweet Ghostly Banana Ghost Pops lies in their simplicity and versatility.
You can easily adapt these treats to fit your style and preferences.
They’re not only a delightful addition to Halloween parties, but also a fun and sweet way to share some spooky smiles with friends and family.
Once your ghostly banana pops are set and ready, it’s time to indulge in their adorable deliciousness. Whether you’re serving them at a Halloween bash or surprising your little ones with a ghostly treat, these pops are bound to put a smile on everyone’s face.
A Spooktacular Feast: Reflecting on Our Wickedly Delicious Halloween Food Adventures
Just imagine those little goblins and witches at your Halloween bash, their eyes widening in delight as they bite into those ghostly banana pops or nibble on those witchy pretzels.
You, my fellow party planner, have crafted not just food, but moments that will be cherished forever – the laughter around the table, the joy of sharing a perfectly spooky bite, and the pride of pulling off an unforgettable gathering.
As the bats retire and the moon bids us farewell, remember that the kitchen is your cauldron of magic, where every recipe becomes a potion of happiness.
So whether you’re hosting a chilling Halloween party or simply craving a dash of spooky fun, let these ideas be your guide to crafting unforgettable memories.
Here’s to more kitchen adventures, more creative concoctions, and more reasons to celebrate the joy of sharing good food with those you love.
