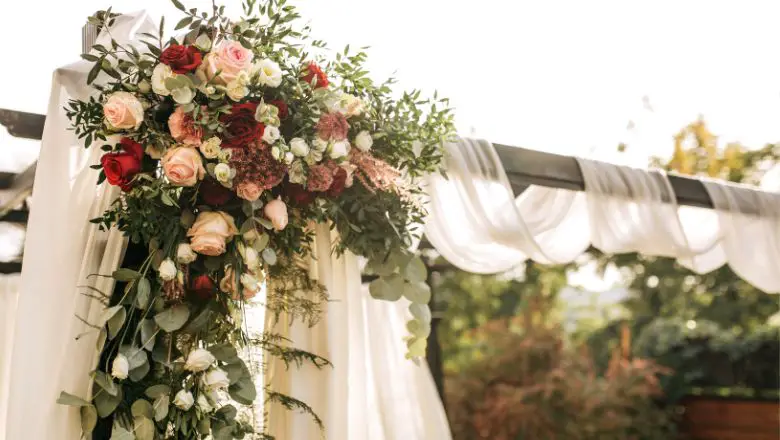
If you’re looking to add some DIY flair to your wedding decor, creating your own chandelier and fern overhang is a great place to start.
With just a few simple steps and some creativity, you can make a beautiful and personalized decoration that will make your wedding day even more special.
In this article, I’ll share my experience and tips for making your own chandelier and fern overhang, so you can create a one-of-a-kind centerpiece that will impress your guests and make your wedding day unforgettable.
How to Make Your Own Chandelier & Fern Overhang For Wedding Decoration?

As someone who loves DIY projects, I knew that I wanted to make my own chandelier and fern overhang for my wedding decoration.
Not only would it save me money, but it would also add a personal touch to my special day.
After doing some research and gathering the necessary materials,
I was able to create a stunning and unique centerpiece that wowed my guests.
Choosing the Right Materials
When it comes to creating a chandelier and fern overhang for a wedding, choosing the right materials is essential.
Not only do you want the final product to look beautiful, but you also want it to be sturdy and safe.
Here are some tips on selecting the right materials for your DIY project:
Selecting the Right Type of Fern
When selecting the type of fern to use for your overhang, it’s important to consider the environment it will be in.
If the wedding is taking place outdoors, you’ll want to choose a fern that can tolerate direct sunlight and wind. Some good options include Boston ferns, maidenhair ferns, and sword ferns.
If the wedding is indoors, you can choose a wider variety of ferns, including those that prefer low-light conditions.
In addition to considering the environment, you’ll also want to think about the size and shape of the fern.
Make sure the ferns you choose are not too large or heavy for the chandelier and that they have a natural droop to them.
This will create a beautiful cascading effect when they are hung.
Choosing the Right Chandelier
When it comes to choosing the right chandelier for your project, there are a few things to keep in mind.
First, consider the size of the space where the chandelier will be hung. You don’t want a chandelier that is too large or too small for the area. As a general rule, the chandelier should be about one-third the width of the table it will be hanging over.
Next, think about the style of the chandelier. Do you want something sleek and modern, or do you prefer a more ornate, vintage look? Keep in mind that the chandelier should complement the overall style of the wedding, so choose something that fits with the theme.
Finally, consider the weight of the chandelier. You’ll want to make sure it’s not too heavy for the ferns and that it can be safely hung from the ceiling. If you’re unsure about the weight, consult with a professional to ensure that the chandelier is securely fastened.
Preparing the Fern Overhang
One of the most important aspects of creating a beautiful chandelier and fern overhang is preparing the ferns themselves.
Here are the steps I took to get my ferns ready for the project:
Cleaning and Trimming the Ferns
First, I made sure to carefully clean each fern stem with a damp cloth.
This helped remove any dirt or debris that may have accumulated on the leaves. Then, I trimmed off any brown or wilted leaves using a pair of sharp scissors.
This not only made the ferns look more visually appealing but also helped promote new growth.
Next, I separated the ferns into smaller bunches to make them easier to work with.
I found that having smaller bunches also helped ensure that each section of the overhang had a consistent look and feel.
Attaching the Ferns to the Overhang
Once the ferns were all cleaned and trimmed, it was time to start attaching them to the overhang.
I used wire to attach each bunch of ferns to the trellis. Starting on one side of the trellis, I attached a long, low fern overhang about 10 inches from the end.
Then, I wired another few stems of ferns together and added them to the opposite side of the trellis.
I continued to work my way down the trellis, adding ferns to each side in a staggered pattern.
I made sure to step back and take a look at the overhang frequently to ensure that it was balanced and visually appealing.
Overall, preparing the ferns for the chandelier and fern overhang was a time-consuming process, but it was well worth it in the end.
The result was a beautiful, rustic glam look that added the perfect touch of elegance to my wedding decorations.
Assembling the Chandelier
Wiring the Chandelier
To start assembling the chandelier, you need to wire the light bulbs.
First, make sure that the power is turned off.
Then, strip the wires on the end of the pendant cord and twist them together with the wires on the socket. Make sure to connect the wires with the same color.
Once the wires are connected, screw the socket onto the pendant cord. Repeat this process for all the light bulbs.
Assembling the Chandelier Base
Next, it’s time to assemble the chandelier base. Start by attaching the arms to the center post.
Make sure to tighten the screws securely.
Then, attach the candle cups to the arms. Once the candle cups are attached, you can attach the light bulbs to the sockets.
Attaching the Crystals
Now, it’s time to attach the crystals to the chandelier.
Start by attaching the largest crystals to the bottom of the chandelier.
Then, attach the smaller crystals to the arms of the chandelier. Make sure to attach the crystals securely so they don’t fall off.
Final Touches
Once all the crystals are attached, it’s time to add any final touches to the chandelier.
This may include adding decorative beads, ribbons, or other embellishments. Make sure to step back and admire your work once you’re finished!
Assembling a chandelier may seem daunting at first, but with a little patience and attention to detail, anyone can do it.
By following these steps, you’ll have a beautiful chandelier that will light up any room or event space.
Attaching the Fern Overhang to the Chandelier
Now that you have created your beautiful fern overhang, it’s time to attach it to the chandelier. This step can be a bit tricky, but with a little patience and some floral stem wire, you’ll have it looking stunning in no time!
First, determine where you want to attach the ferns to the chandelier.
Depending on the size and shape of the chandelier, you may need to attach the ferns with floral stem wire.
Wrap the wire around the fern stems and then attach them to the chandelier. Or if the openings on the chandelier are wide enough, you can just weave the ferns through.
When attaching the ferns, make sure to evenly distribute them around the chandelier. You don’t want one side to be heavier than the other, as this can cause the chandelier to become unbalanced.
If you have a large chandelier, you may want to consider attaching the ferns in sections. This will make it easier to manage and ensure that each section is evenly distributed.
It’s important to note that the ferns may wilt over time, especially if they are not watered regularly. To prevent this, you can mist them with water every few days or place a small dish of water on the chandelier to keep them hydrated.
Overall, attaching the fern overhang to the chandelier can be a bit of a challenge, but with some patience and creativity, you can create a beautiful and unique wedding decoration that will leave your guests in awe.
Hanging the Chandelier and Fern Overhang
Choosing the Right Location
Before hanging the chandelier and fern overhang, it is important to choose the right location.
You want to make sure that the area is spacious enough to accommodate the chandelier and ferns without overcrowding the space.
It is also important to consider the height of the ceiling and the weight capacity of the hanging mechanism. You don’t want the chandelier and ferns to come crashing down during the wedding reception.
Hanging the Chandelier and Fern Overhang
Once you have chosen the right location, it is time to hang the chandelier and fern overhang. Here are the steps I followed to hang my own chandelier and fern overhang:
Install the hanging mechanism:
First, I installed a sturdy hook or eye bolt into the ceiling at the desired location. I made sure to use a drill and appropriate hardware to ensure that the hook or eye bolt was securely fastened.
Attach the chain:
Next, I attached a chain to the hook or eye bolt. The length of the chain will depend on the height of the ceiling and the desired length of the chandelier and fern overhang.
Hang the chandelier:
I then hung the chandelier from the chain, making sure to follow the manufacturer’s instructions for installation.
Add the fern overhang:
Finally, I added the fern overhang by attaching individual ferns to the chandelier using floral wire. I made sure to space the ferns evenly and add other decorative elements such as flowers or crystals to create a cohesive look.
Overall, hanging a chandelier and fern overhang can be a beautiful and unique way to add a touch of elegance to your wedding reception. With the right location and a little bit of creativity, you can create a stunning focal point that will leave a lasting impression on your guests.
Unleash Your Creativity with a Personalized Chandelier & Fern Overhang for Your Dream Wedding Decor
I hope this DIY guide has inspired you to create your own chandelier and fern overhang for your wedding day.
Making your decorations not only adds a personal touch to your special day, but also allows you to unleash your creativity and have some fun in the process.
With just a few simple materials and some creativity, you can create a stunning and unique piece that will impress your guests and create unforgettable memories.
So, gather your supplies and get crafting – your dream wedding decor awaits!
